Quick start with Azure OpenAI
- Self-hosted: Enterprise Plus (existing Business plan customers keep access)
Prerequisites
- You have access to Azure AI Foundry
- You have deployed at least one LLM model and one embedding model in Azure AI Foundry
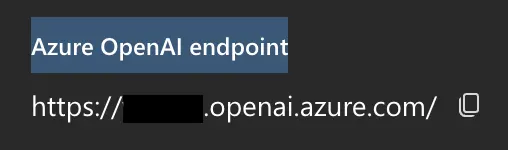
- Prepare your Azure OpenAI API base and API key
- You can find the API base in Azure AI Foundry under your Azure OpenAI resource:
- Your Azure OpenAI API key is also available on the same Keys & Endpoint page in Azure AI Foundry.
- You can find the API base in Azure AI Foundry under your Azure OpenAI resource:
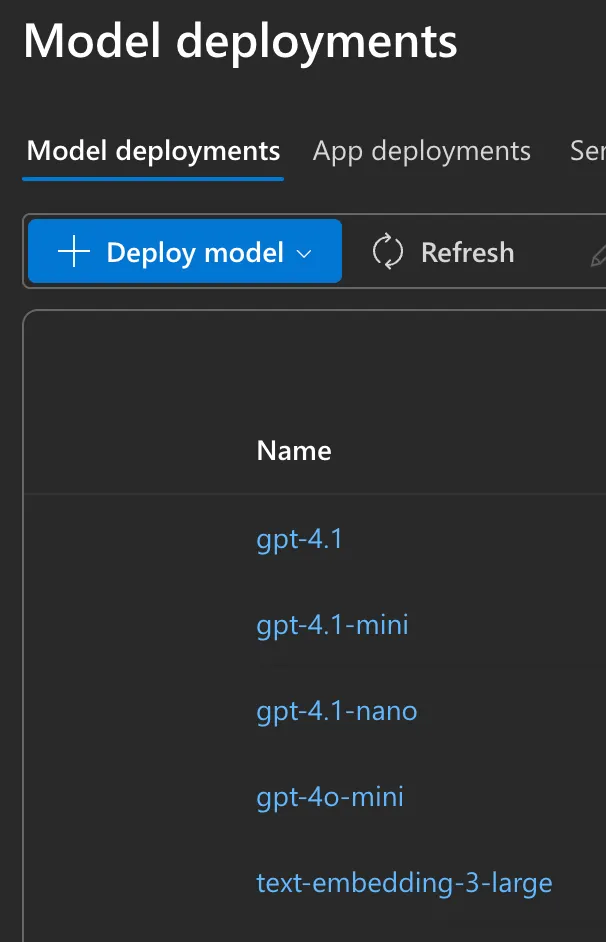
- Prepare your model deployment names. You can find the deployment names in Azure AI Foundry -> Model deployments
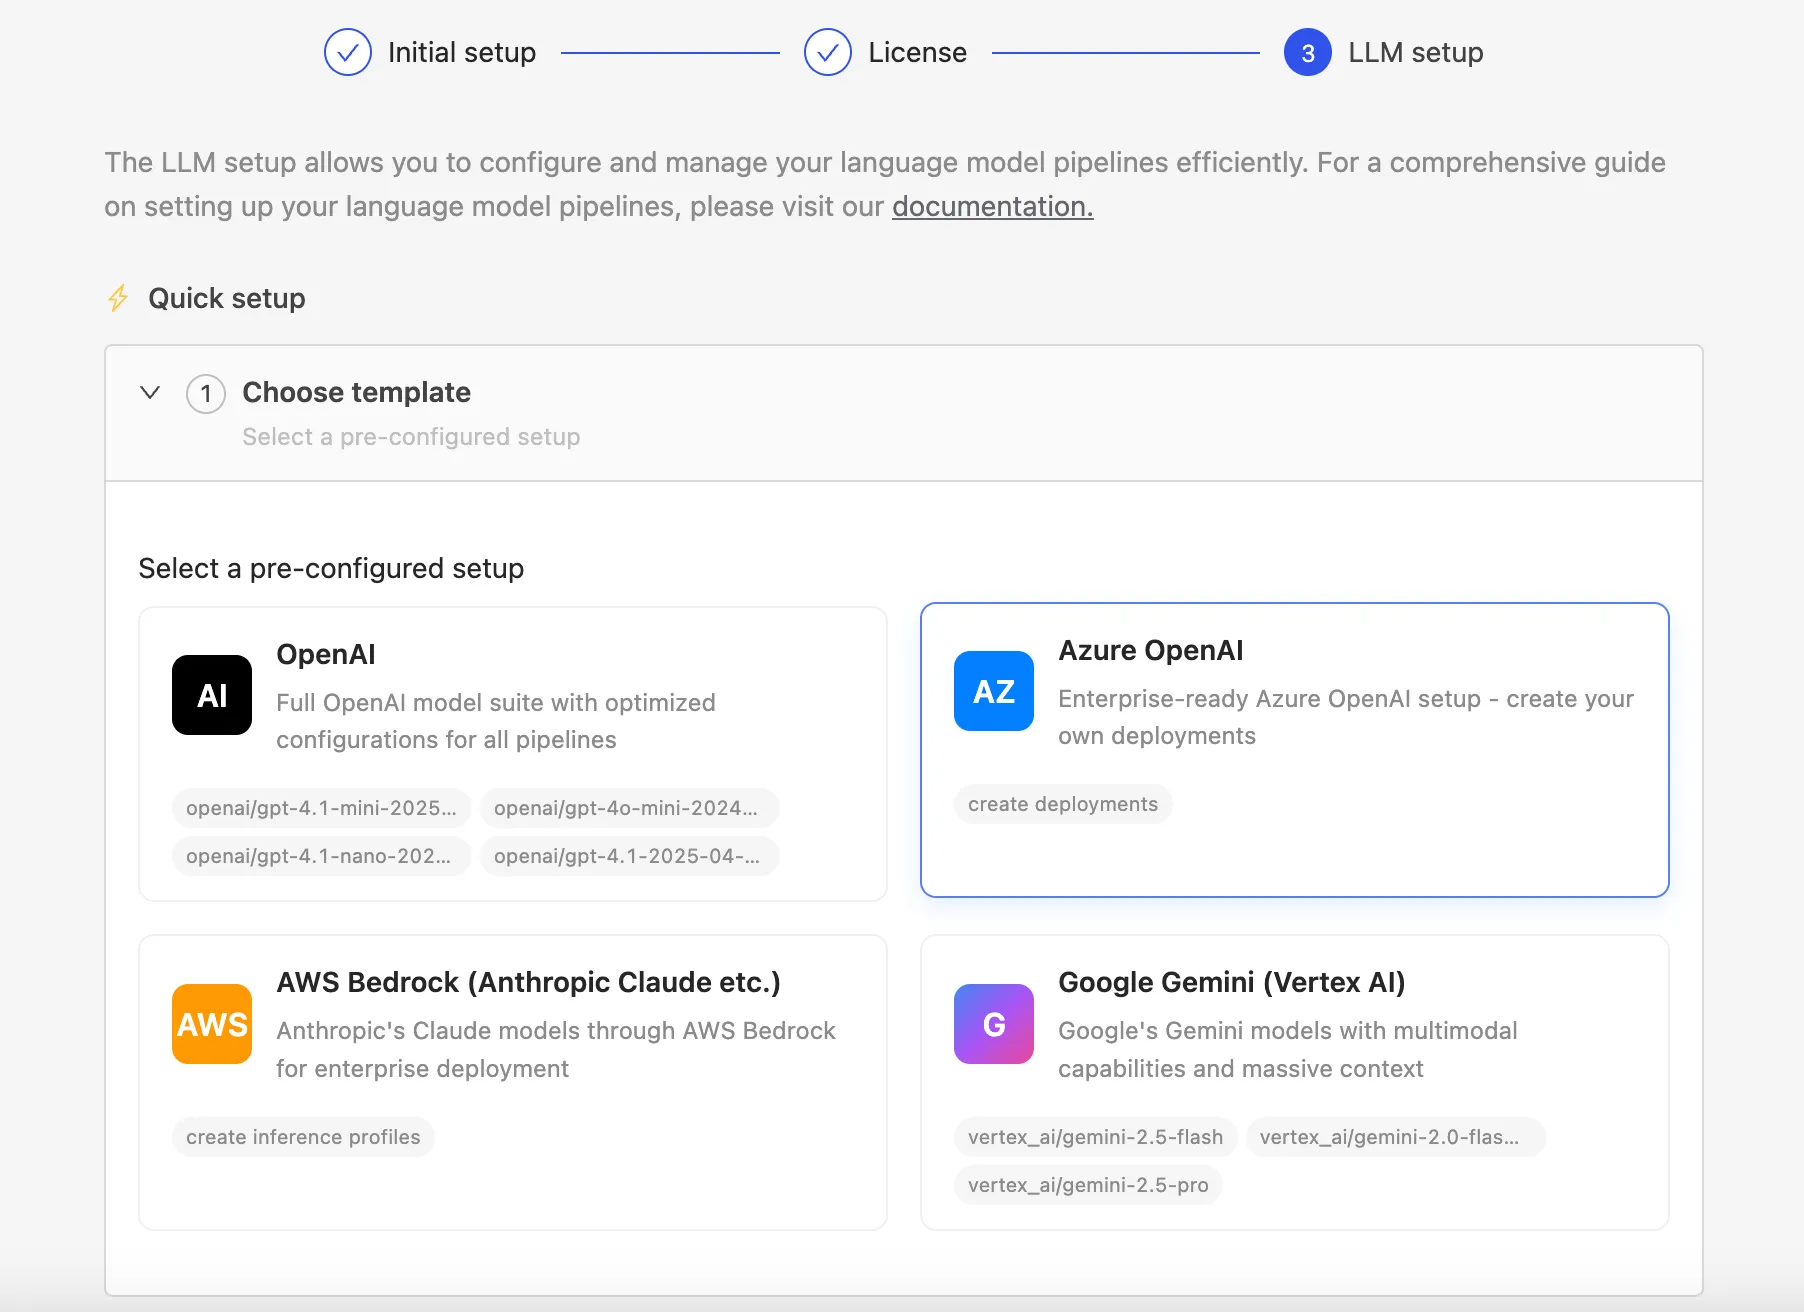
Steps (Quick setup)
1. During onboarding, select "Quick setup" and then "Azure OpenAI".
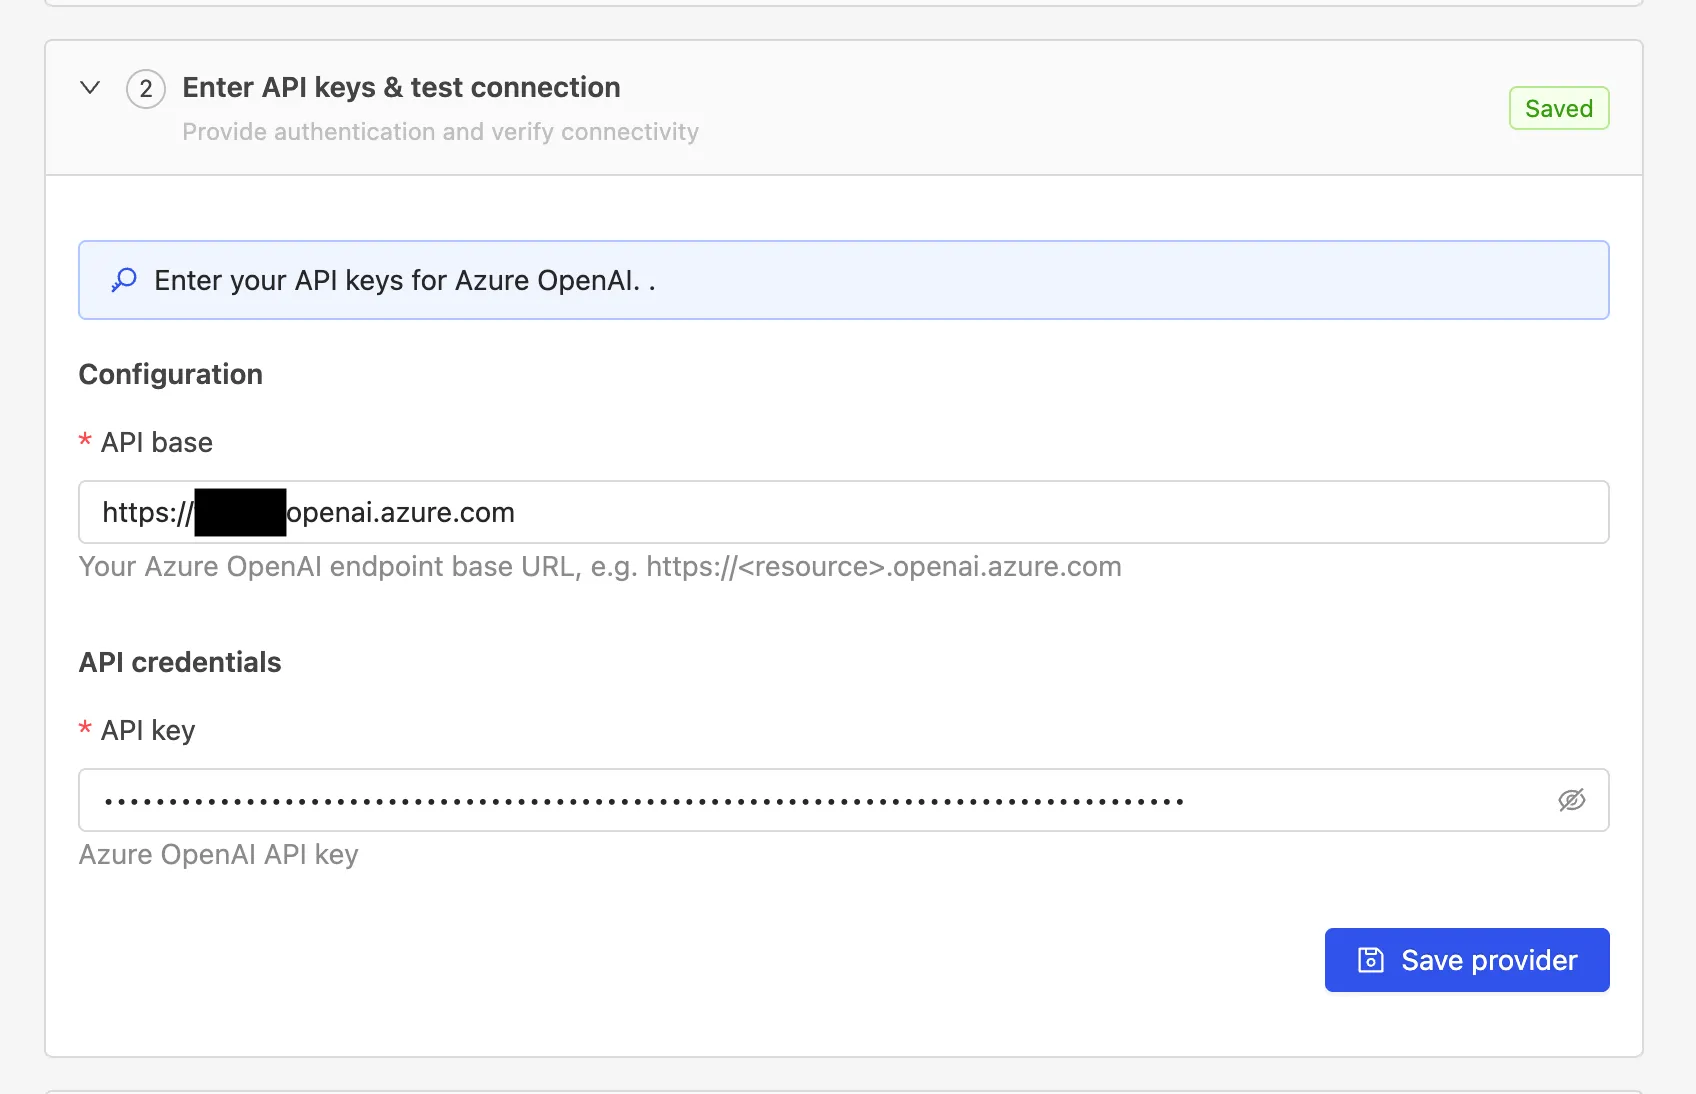
2. Enter your Azure OpenAI API base and API key.
3. Add an embedding model.
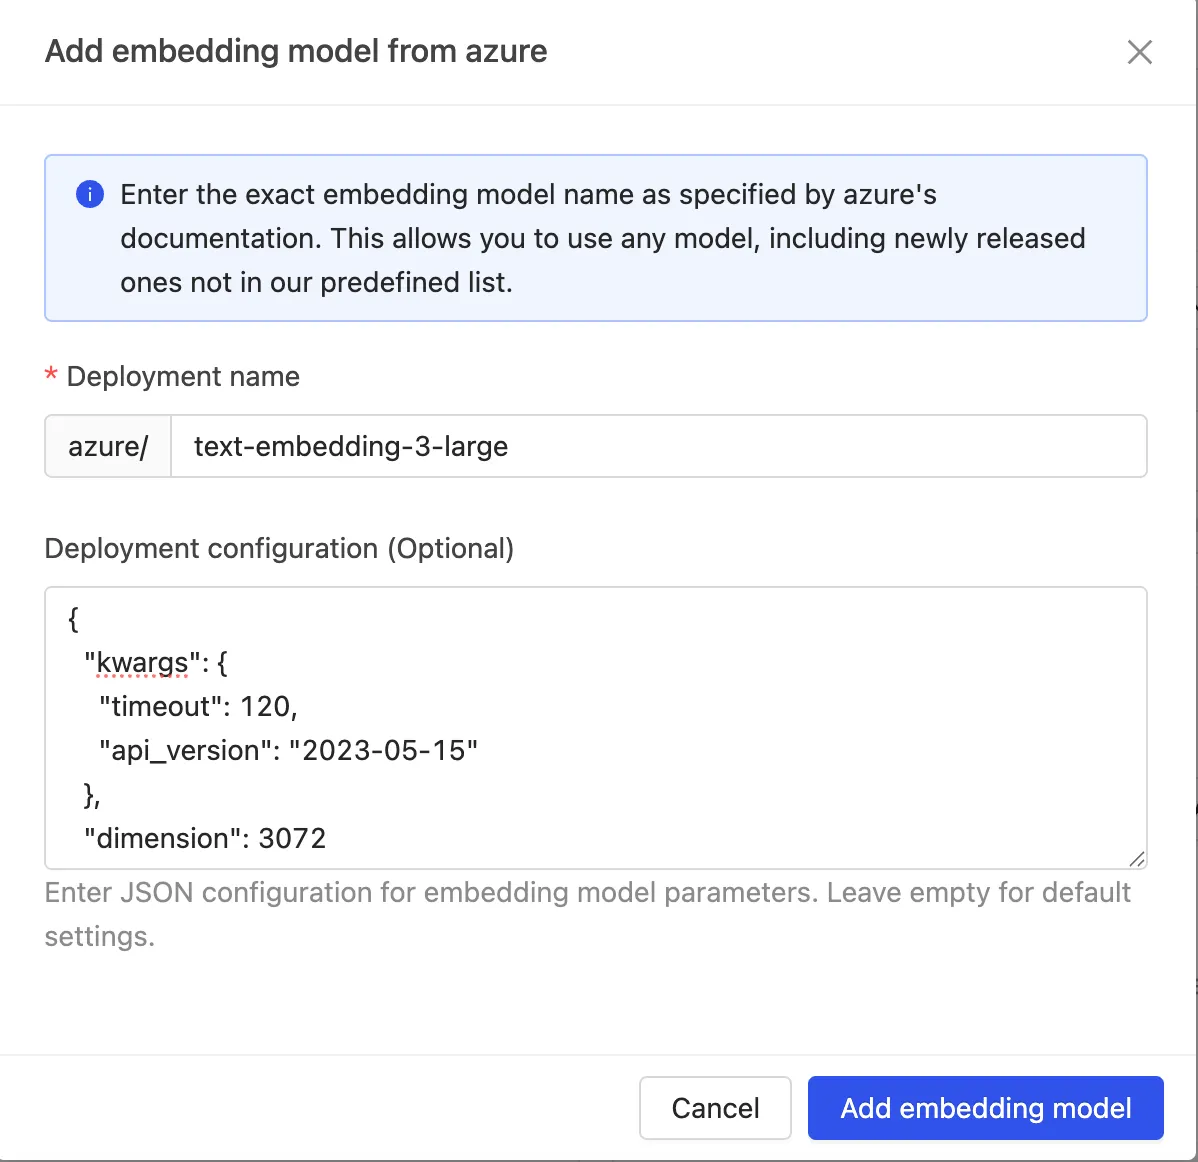
The following steps and screenshots use text-embedding-3-large as an example and may not reflect the current best model configuration. For the latest recommended model combination and configuration, please contact your account manager or sales representative.
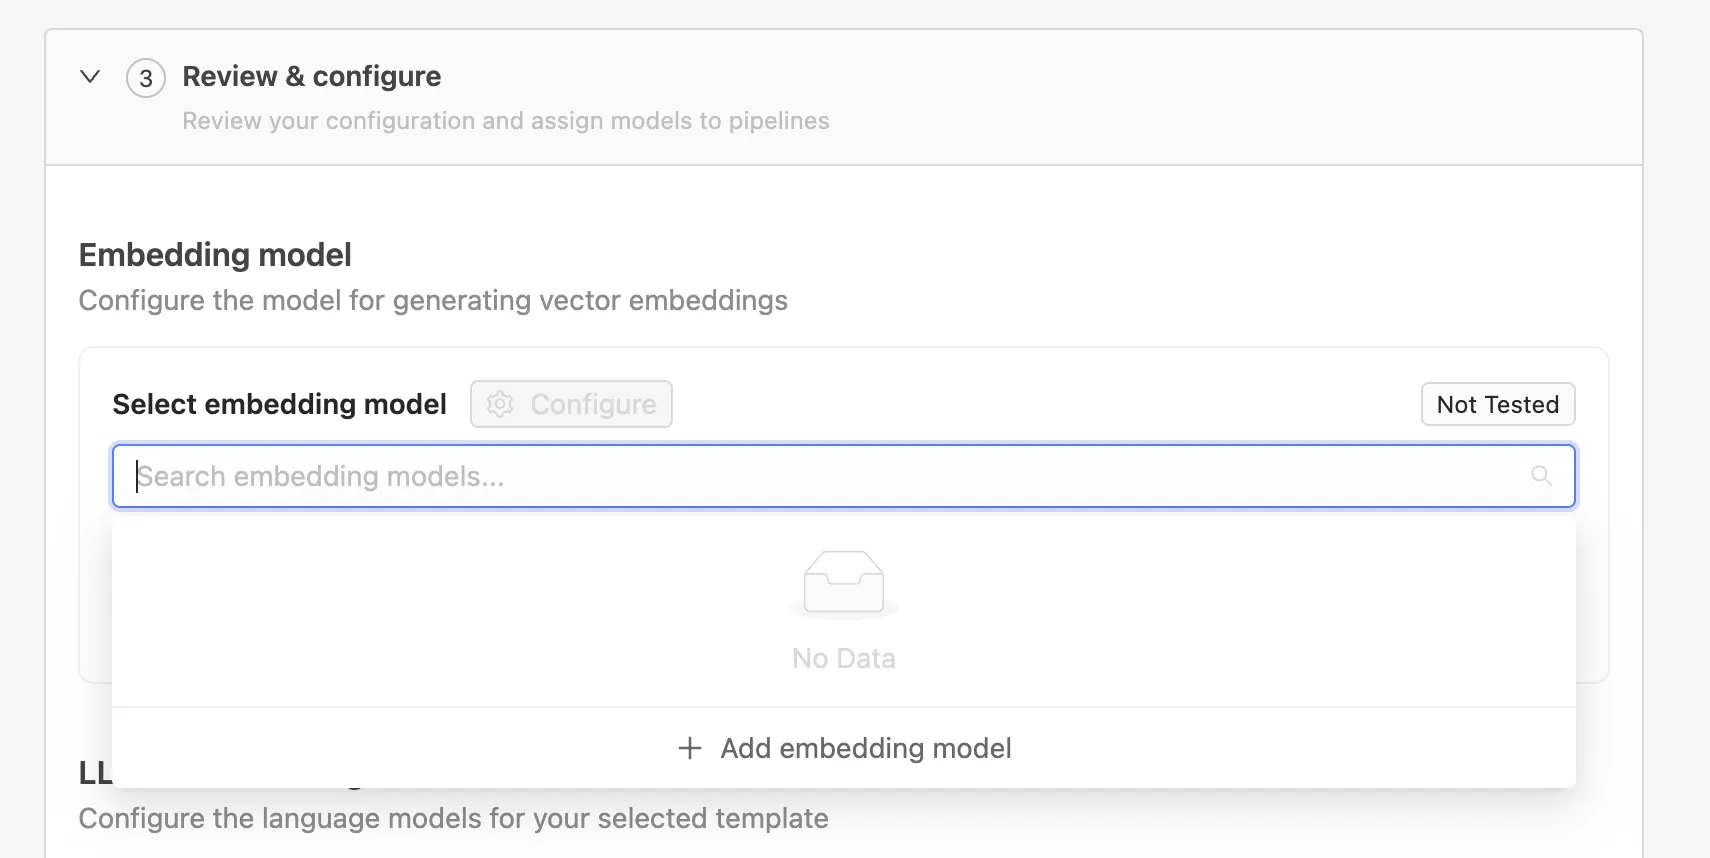
Under Review & configure → Embedding model, click Add embedding model.
Enter the deployment name exactly as defined in Azure and the following model configuration, for example:
{
  "kwargs": {
    "timeout": 120,
    "api_version": "2023-05-15"
  },
  "dimension": 3072
}
4. Add LLM models.
The following steps and screenshots use gpt-4.1 and gpt-4.1-mini as examples and may not reflect the current best model configuration. For the latest recommended model combination and configuration, please contact your account manager or sales representative.
Under Review & configure -> LLM models, click Add model.

Enter the deployment name and model configuration to match the settings defined in Azure AI Foundry.
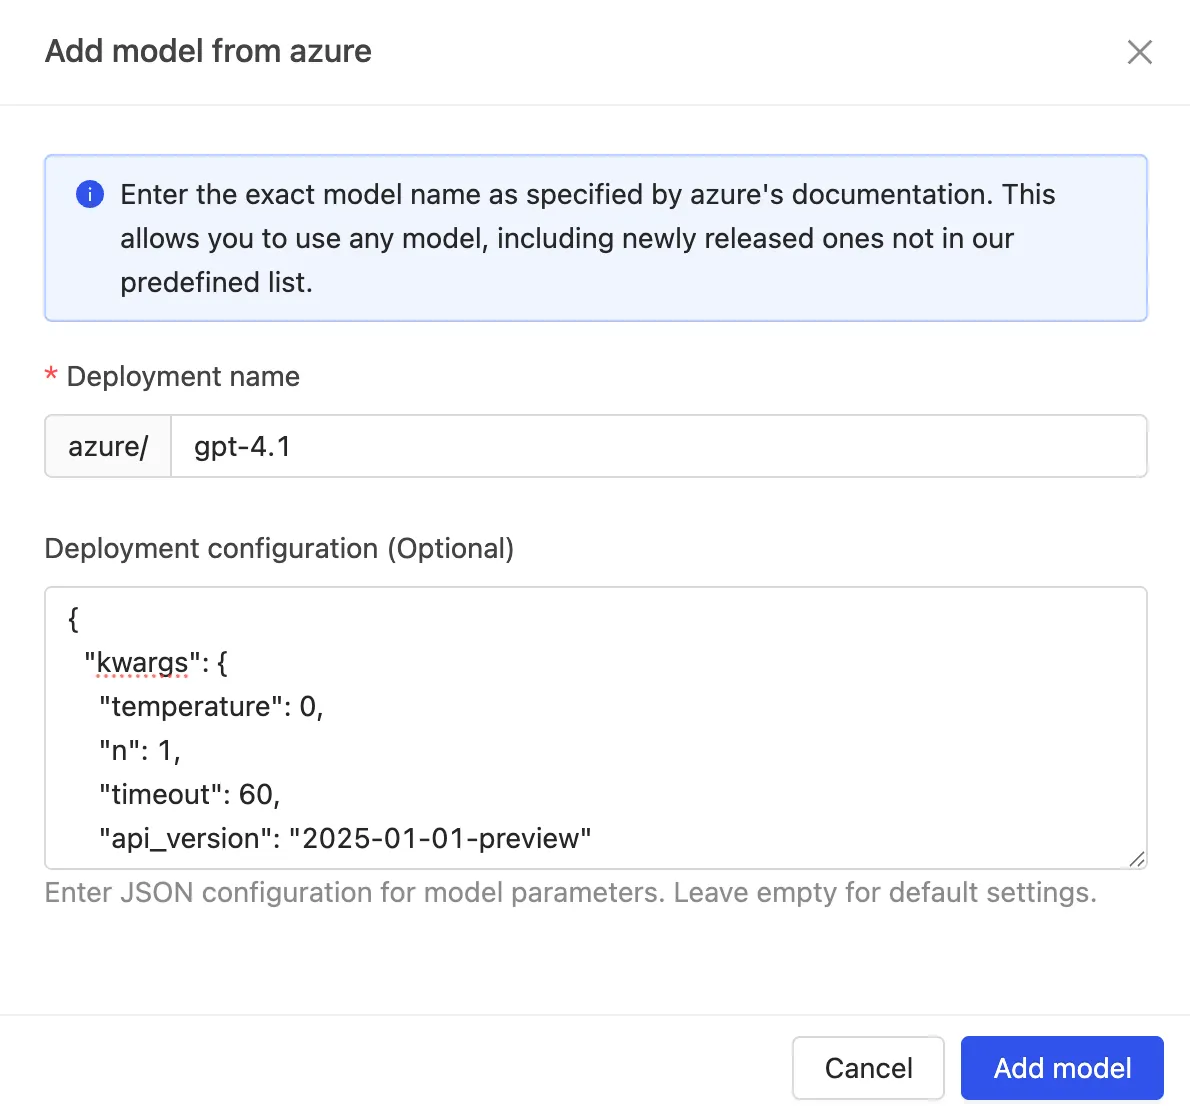
Model configuration for gpt-4.1:
{
    "kwargs": {
        "api_version": "2025-01-01-preview",
        "temperature": 0,
        "n": 1,
        "seed": 0,
        "max_tokens": 4096,
        "timeout": 120
    },
    "context_window_size": 1000000
}
Model configuration for gpt-4.1-mini:
{
    "kwargs": {
        "api_version": "2025-01-01-preview",
        "temperature": 0,
        "n": 1,
        "seed": 0,
        "max_tokens": 4096,
        "timeout": 120
    },
    "context_window_size": 1000000
}
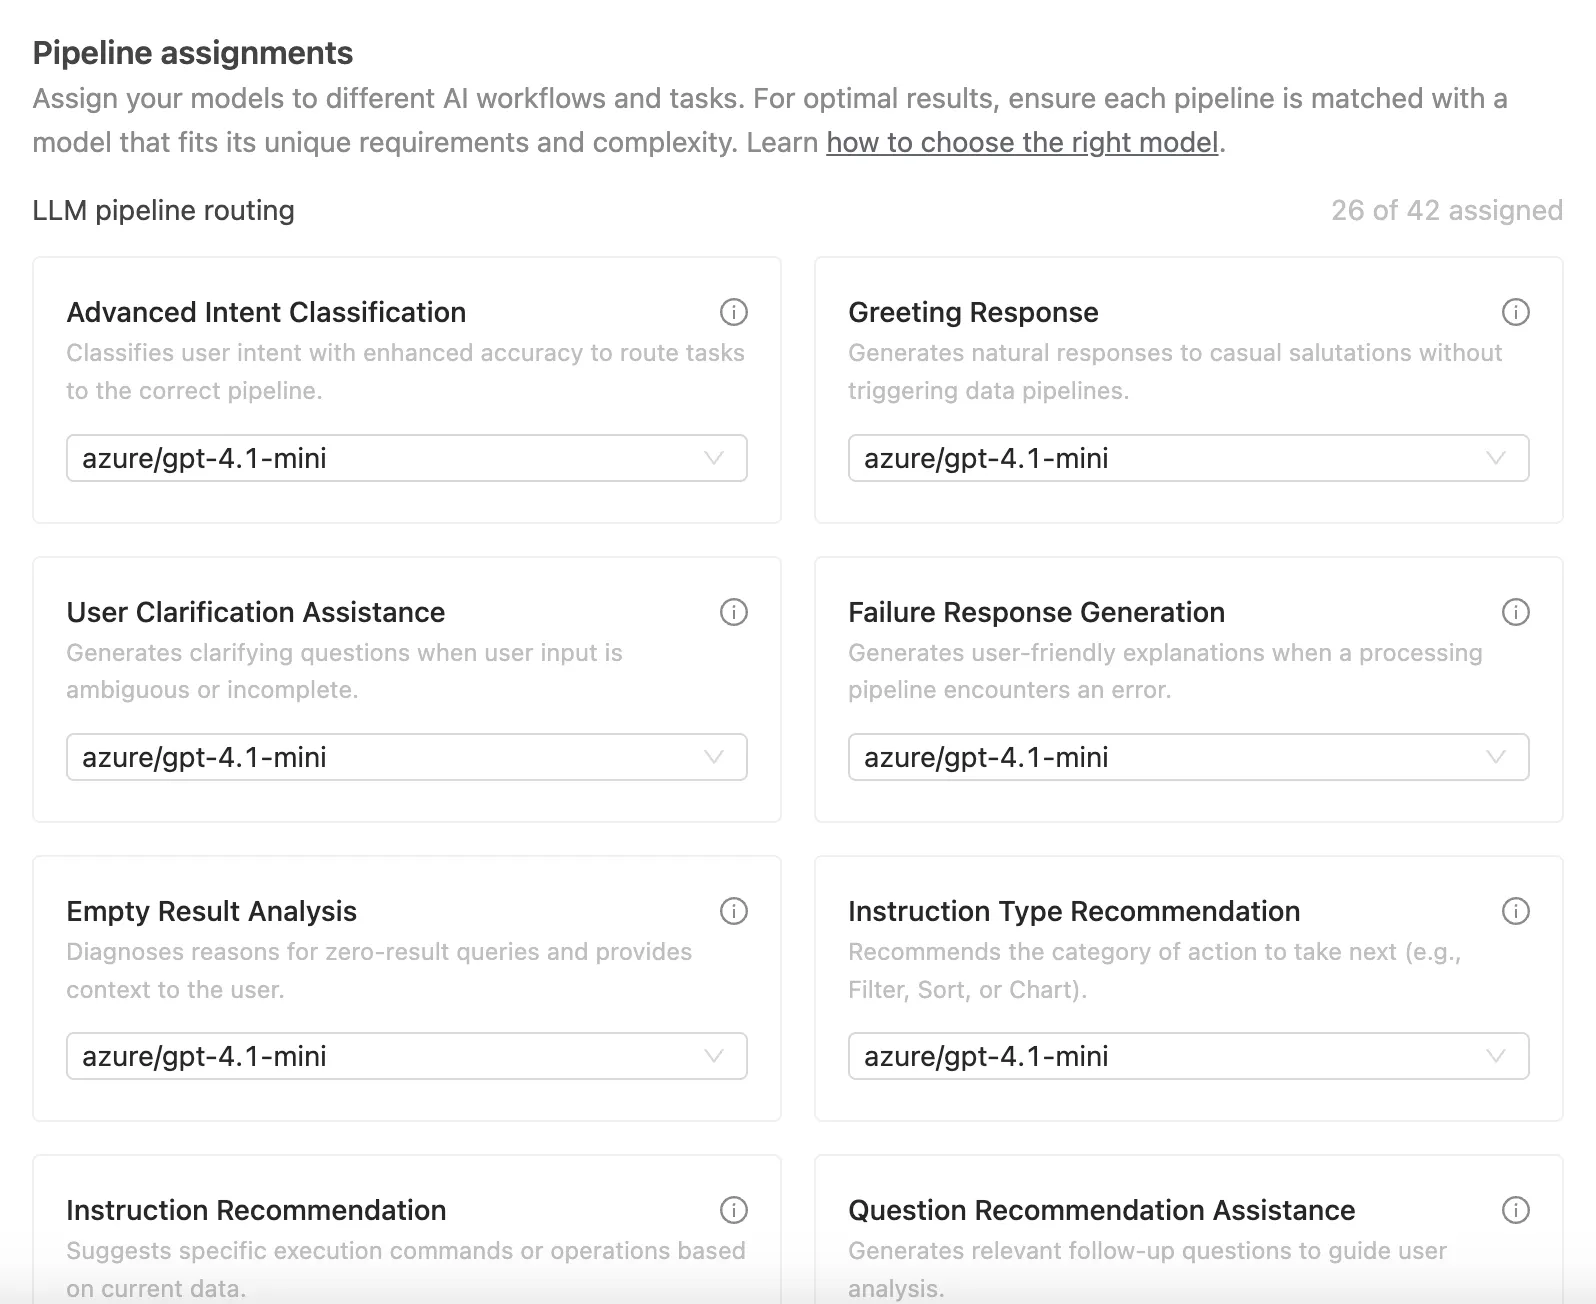
5. Assign models to pipelines.
Under Pipeline assignments, assign models to each pipeline based on their intended usage.
Hover over the ℹ️ icon to view the requirements and purpose of each pipeline.
- For pipelines that require "Advanced capabilities", assign your most capable model.
- For other pipelines, a lighter model is sufficient.
The screenshot below is for illustration purposes only and may not reflect the current best model configuration. For the latest recommended pipeline assignments and model combinations, please contact your account manager or sales representative.
After all pipelines are assigned, click Complete setup. Congratulations! Now Wren AI is fully configured to use Azure OpenAI.