Metadata Quick Start
Sync table and column descriptions from your local YAML documentation files into your Wren AI Cloud project.
In this guide, you'll:
- Install and log in to Wren CLI
- Create a metadata configuration file
- Prepare your metadata YAMLs
- Sync metadata descriptions to Wren AI
- Optionally use --yes to apply without confirmation
1. Install the CLI
Follow the same installation steps as in the Installation and Login guide
If you already have the CLI installed, verify your version:
wren version
2. Log in to Wren AI Cloud
Follow the same login steps as in the Installation and Login guide If you already have the CLI installed and logged in, verify your status:
wren auth status
3. Create a metadata configuration file
Create a metadata-config.yaml file in your workspace.
This file defines how the CLI scans your YAML metadata files, extracts table names, and maps descriptions.
Typical contents:
# metadata-config.yaml

# Path or glob pattern to locate your metadata files.
# Can point to a single file, a directory, or use glob patterns.
file_path: "./metadata/*.yaml"

# (Optional) Limit included files when scanning a directory.
include_patterns:
  - "*.yaml"
  - "*.yml"

# (Optional) Exclude specific files or patterns.
exclude_patterns:
  - "*.backup.yaml"
  - "deprecated_*.yaml"

# Wren AI target project to sync with.
target_project_id: "123"

# Mapping rules for how metadata is extracted from YAML files.
description_property_name: "purpose"         # Field for table description
columns_property_name: "columns"             # Field listing columns
column_description_property_name: "description"  # Field for column descriptions

table_name_property: "metadata.schema_name"
for detailed information , you can check CLI reference's metadata file section
4. Prepare your metadata YAML files
Each metadata YAML file describes one table and its columns. The CLI reads these files and merges their content into the corresponding Wren AI models.
Example file (metadata/customers.yaml):
metadata:
  schema_name: test.customers
  purpose: Customer data table

columns:
  - name: customer_id
    type: string
    description: "Unique customer identifier."

  - name: customer_name
    type: string
    description: "Customer’s full name."

  - name: customer_address
    type: string
    description: "Customer address"
for detailed information , you can check CLI reference's metadata file section
- Run the sync command Run the metadata sync with your configuration:
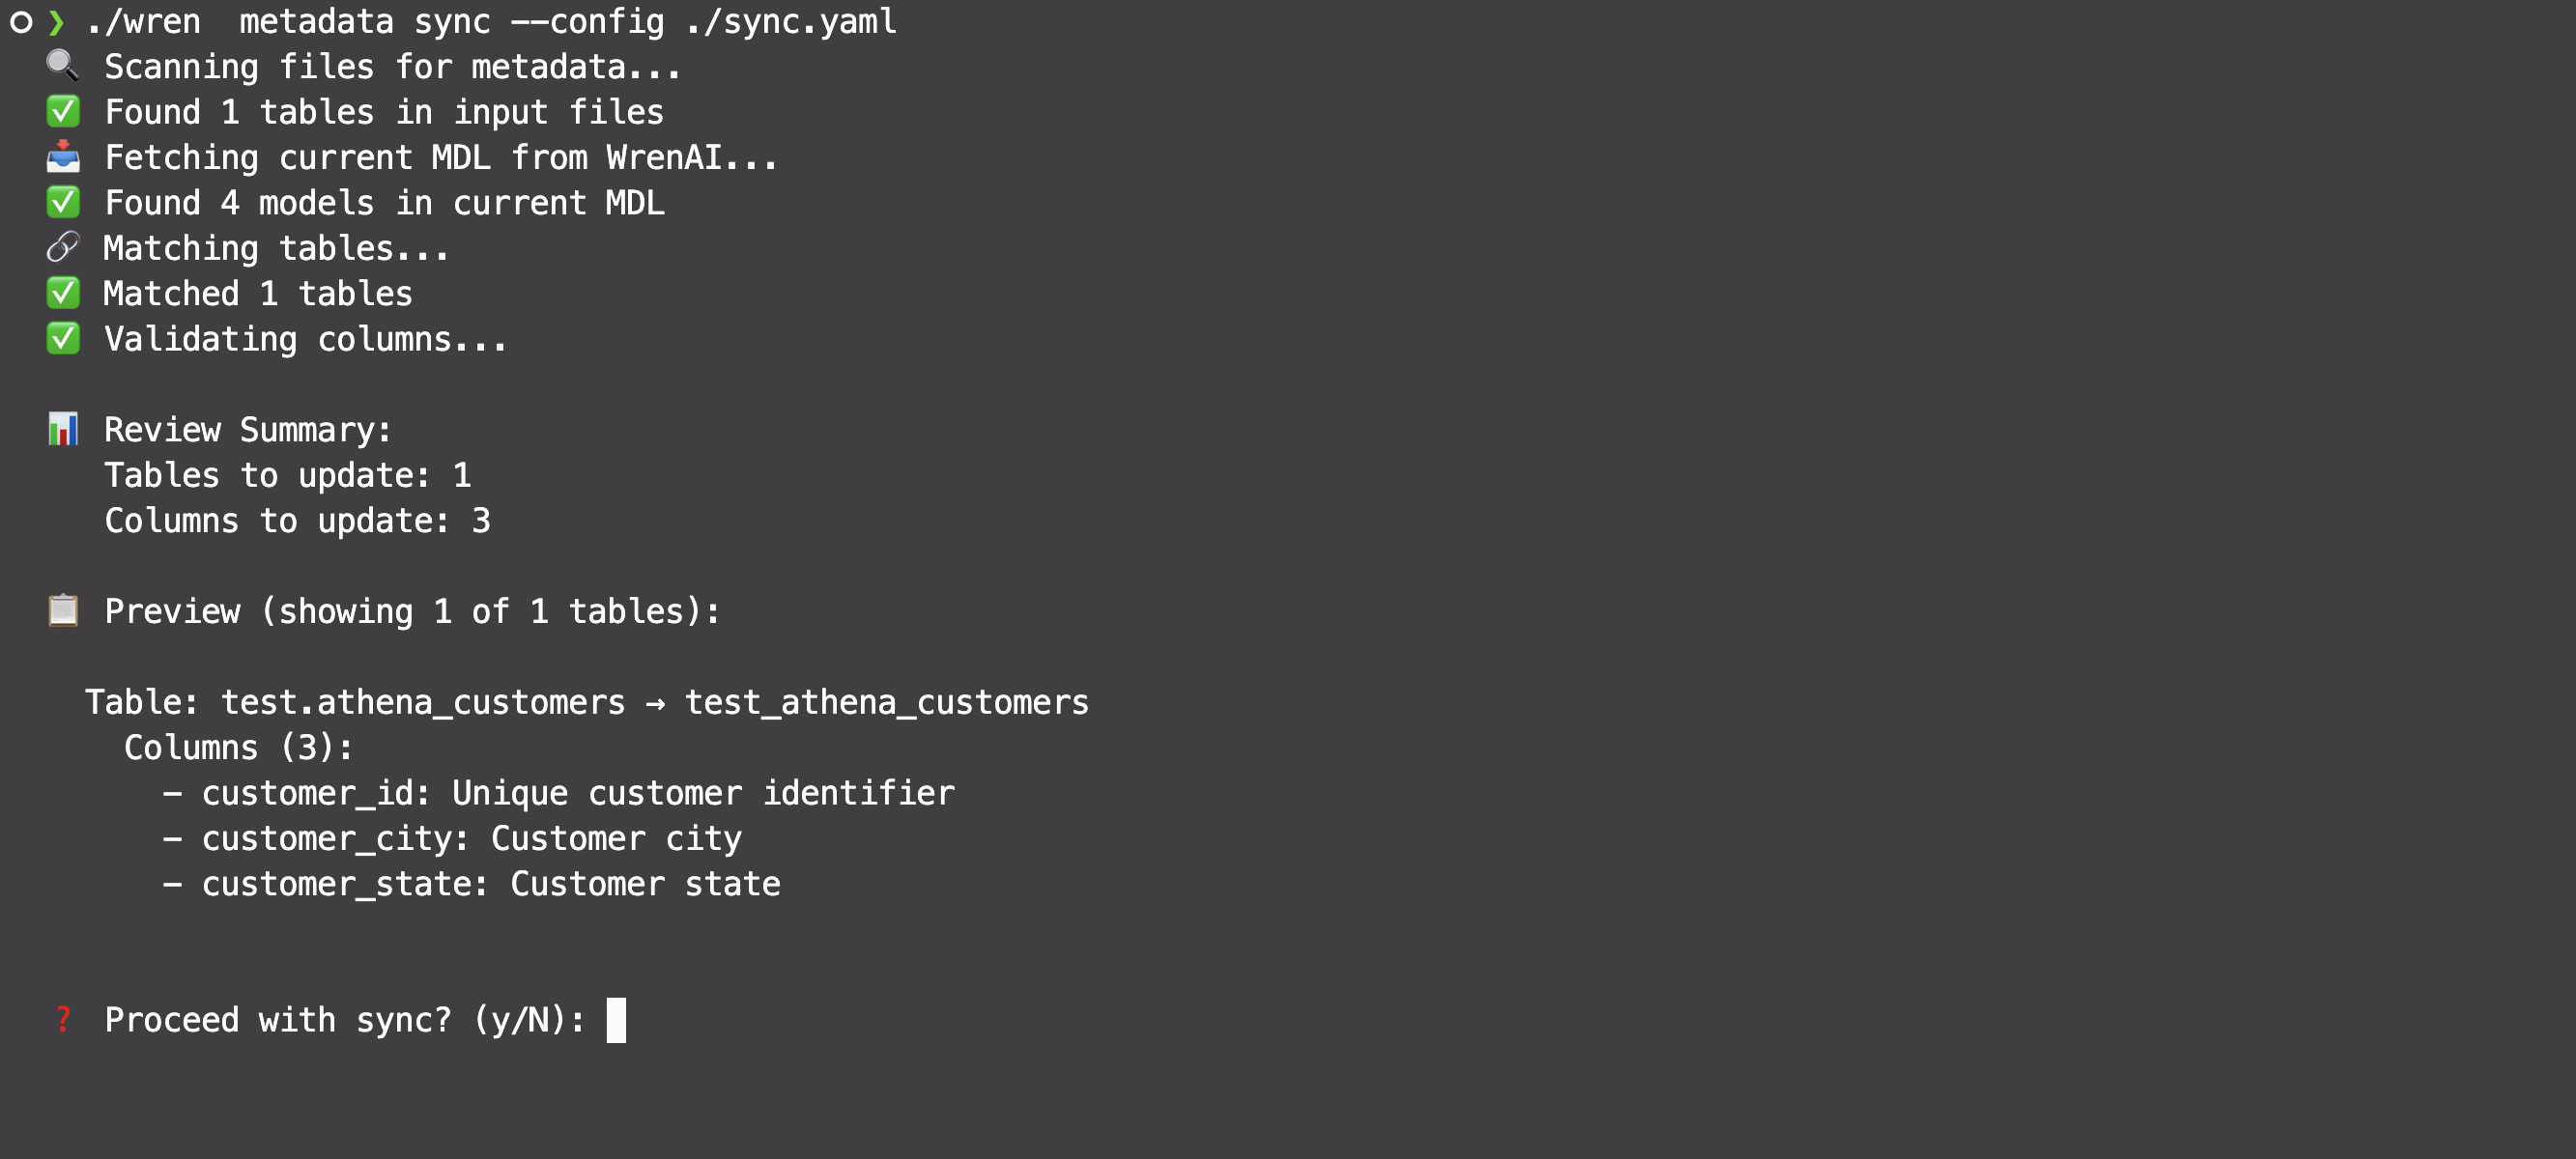
wren metadata sync --config metadata-config.yaml
The CLI will display a preview of all detected changes before applying them, allowing you to review which table and column descriptions will be updated, added, or skipped.

or use the interactive mode (you’ll be prompted for the project):
wren metadata sync --project-id <project-id>
- Confirm and apply updates Before applying, the CLI displays a preview of detected changes:
- Added or updated table descriptions
- Updated column descriptions
- Skipped fields (if not found in MDL)
To apply immediately without confirmation:
wren metadata sync --config metadata-config.yaml --yes
The sync will only update existing tables and columns in Wren AI. New tables or columns found in YAML files will be skipped — they are not created automatically.
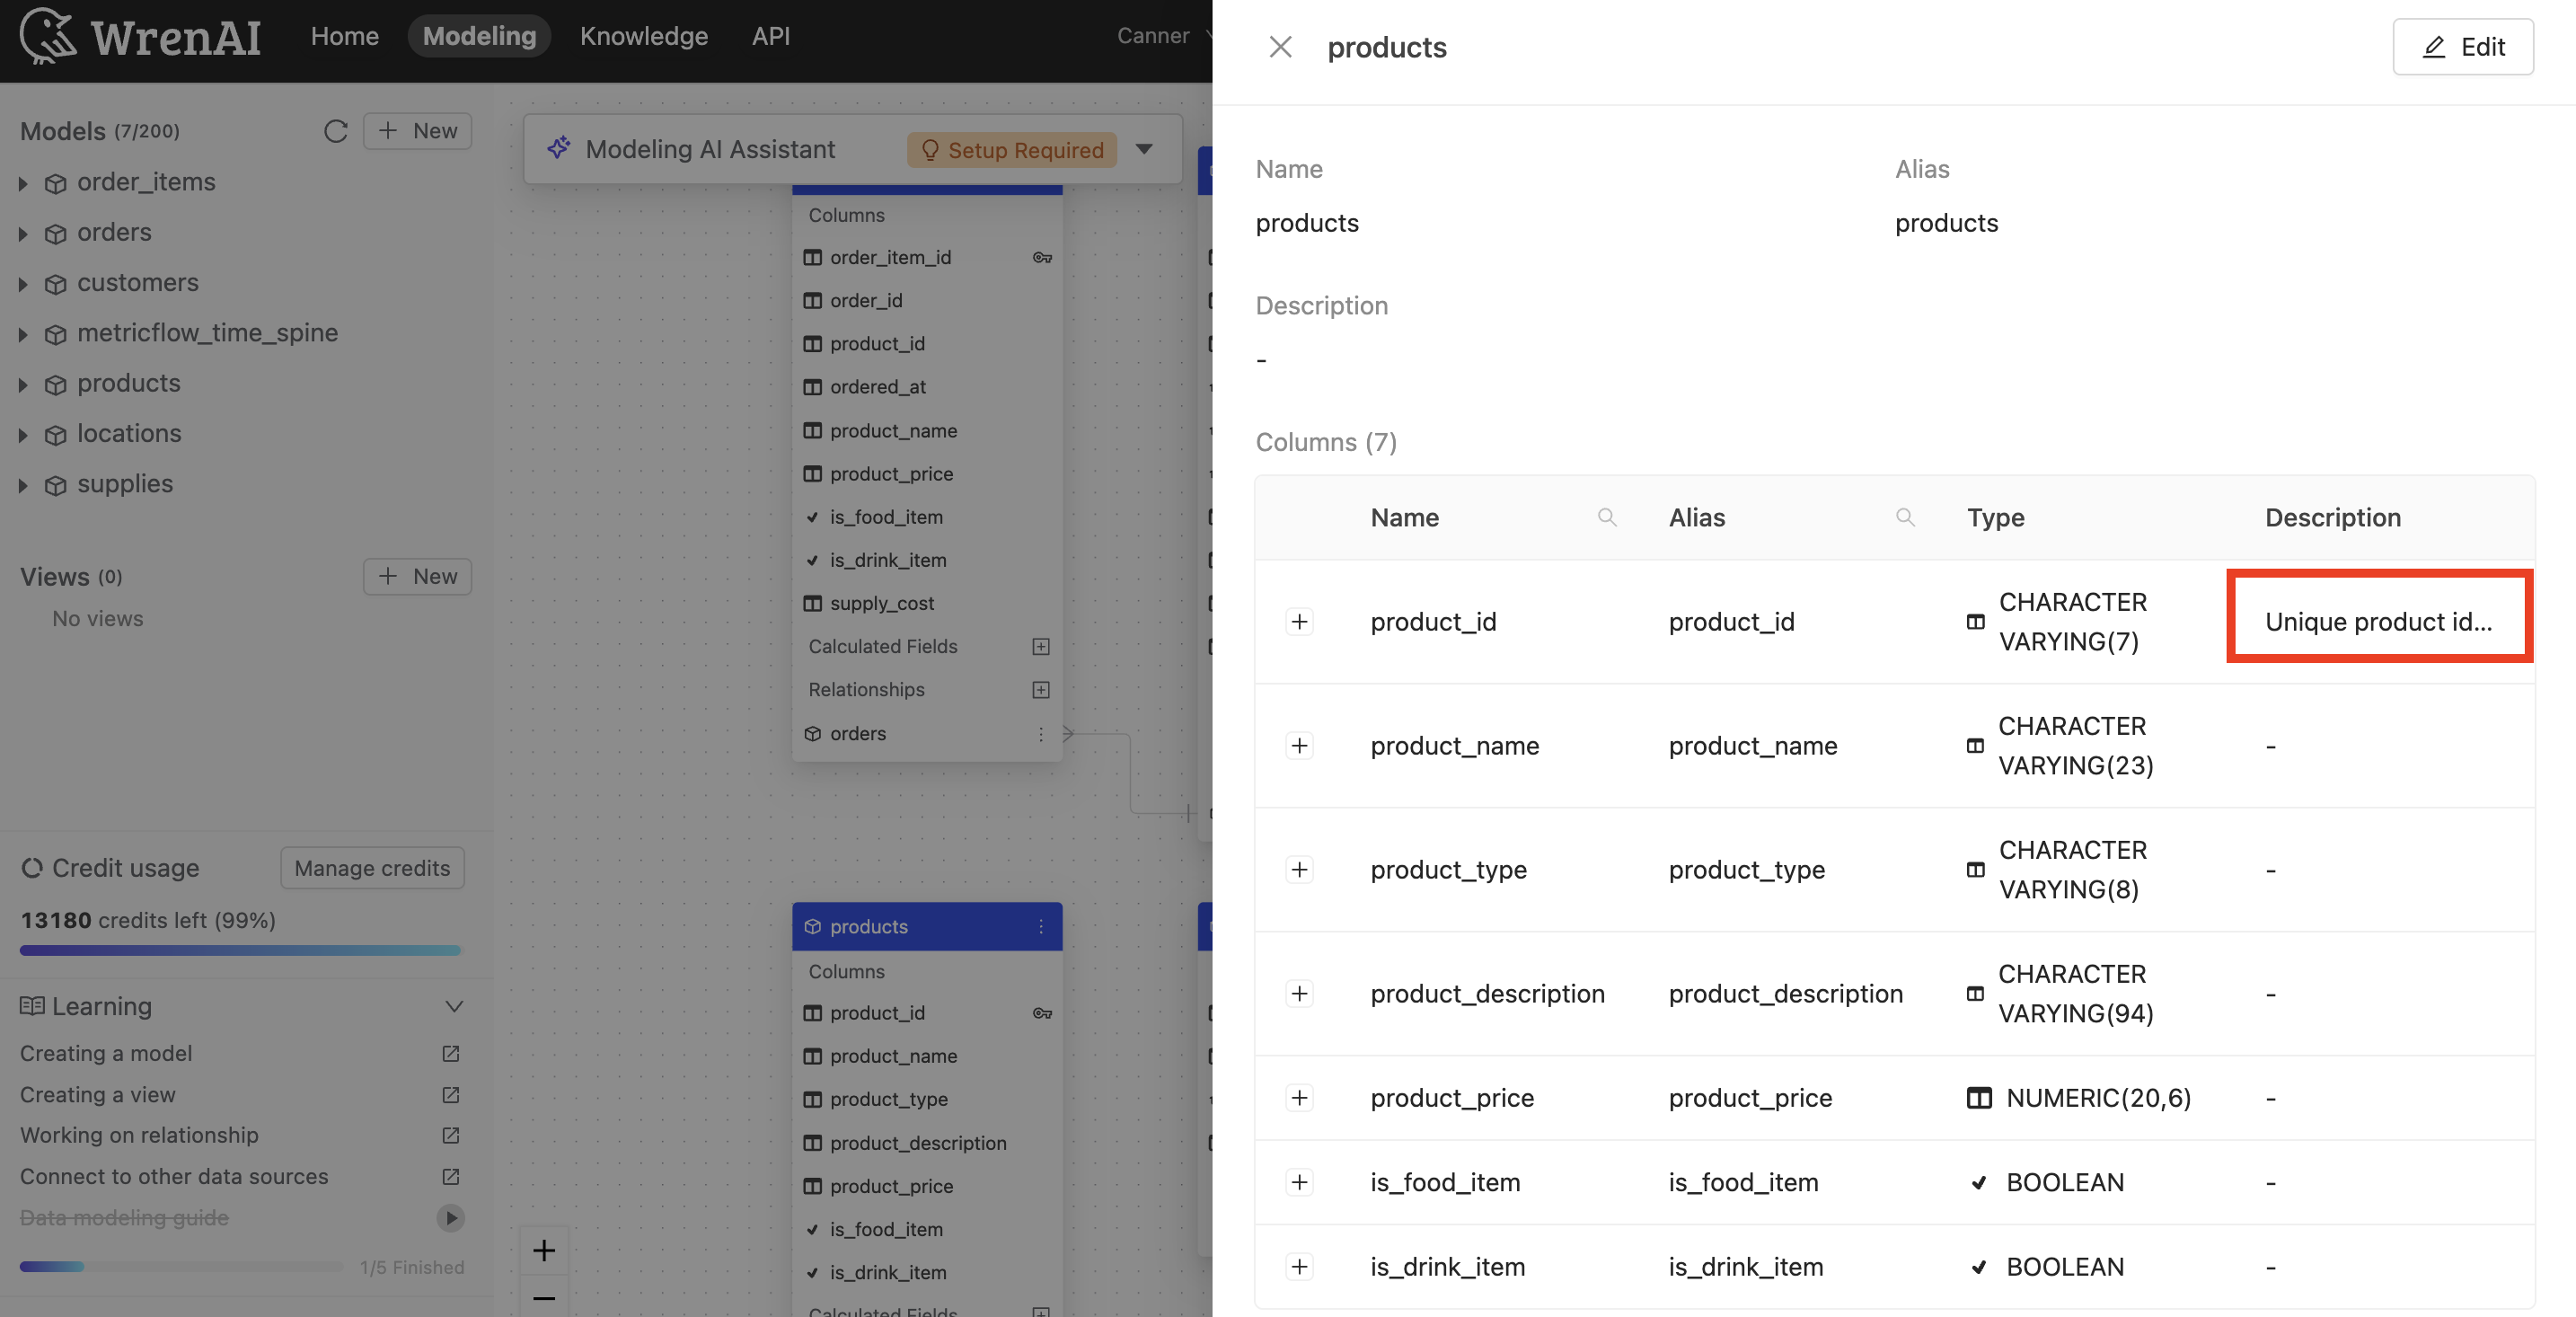
- Verify results in Wren AI
After a successful sync:
- Go to your Wren AI project page.
- Open any updated model.
- Confirm that table and column descriptions are visible under the Metadata tab.
