CSV Upload
Included in Essential plan and above.
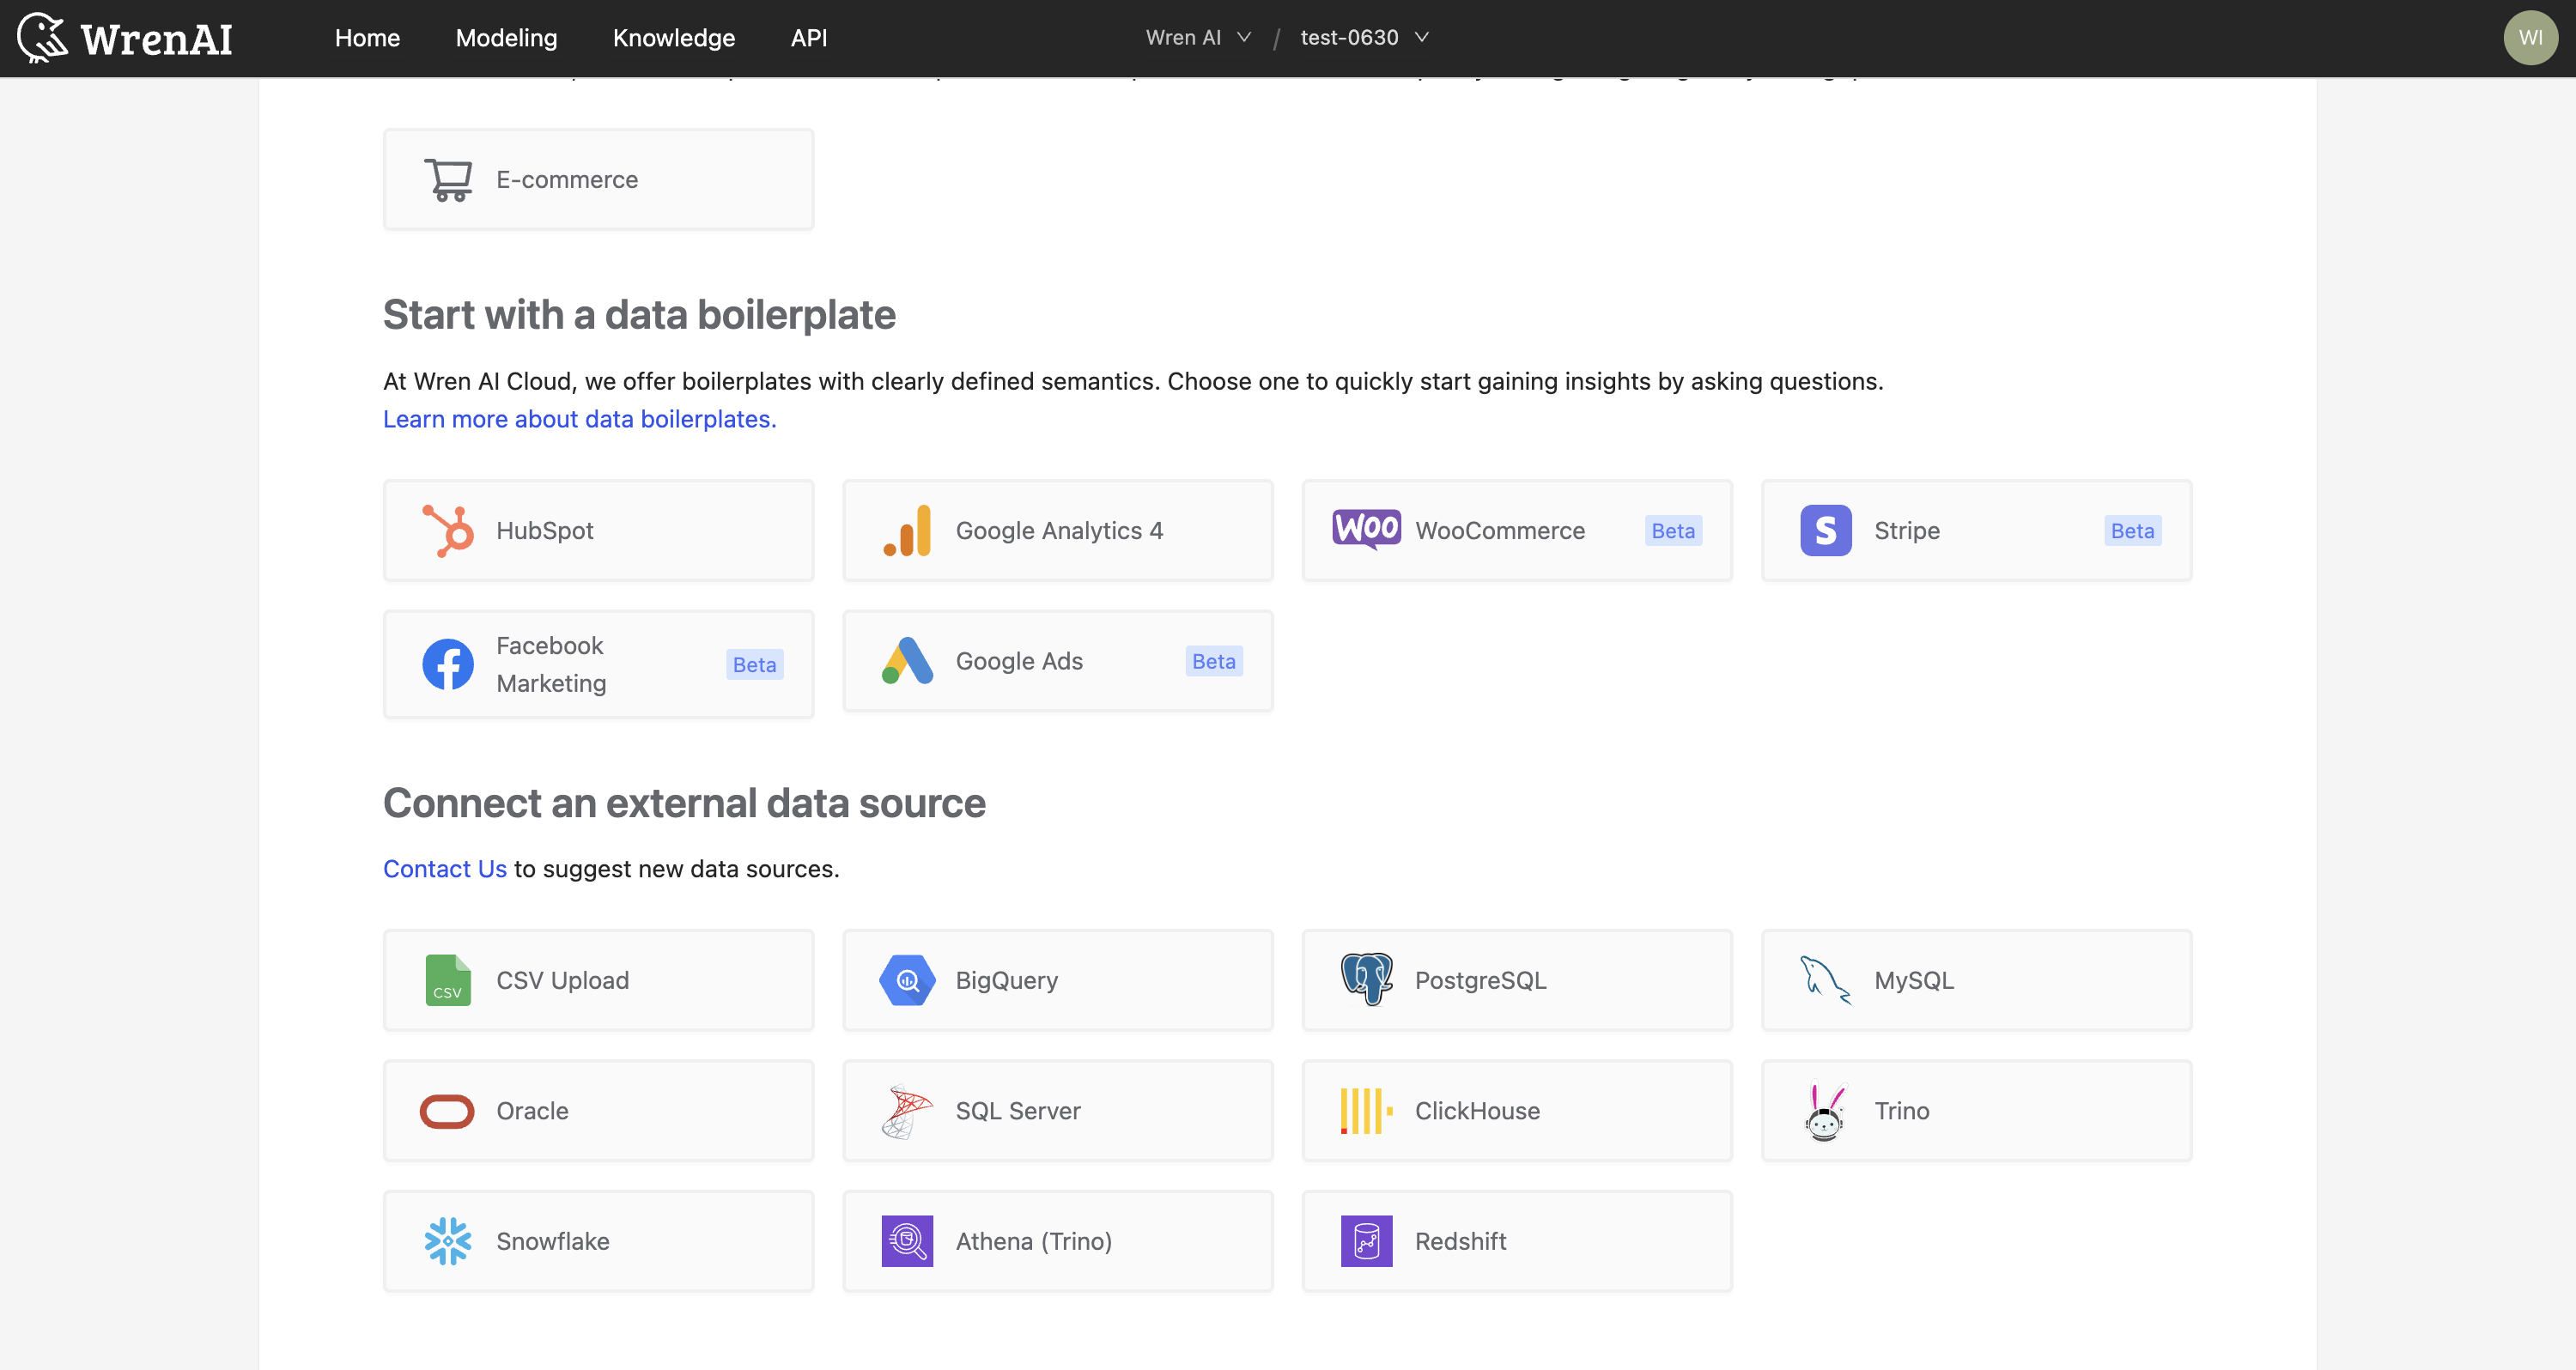
To add a CSV file as a data source, click on the CSV Upload option in Connect an external data source section.
Prerequisites
- CSV file size must be less than 100MB
- CSV file should be properly formatted with headers
- Supported file format:
CSV
Upload CSV Files
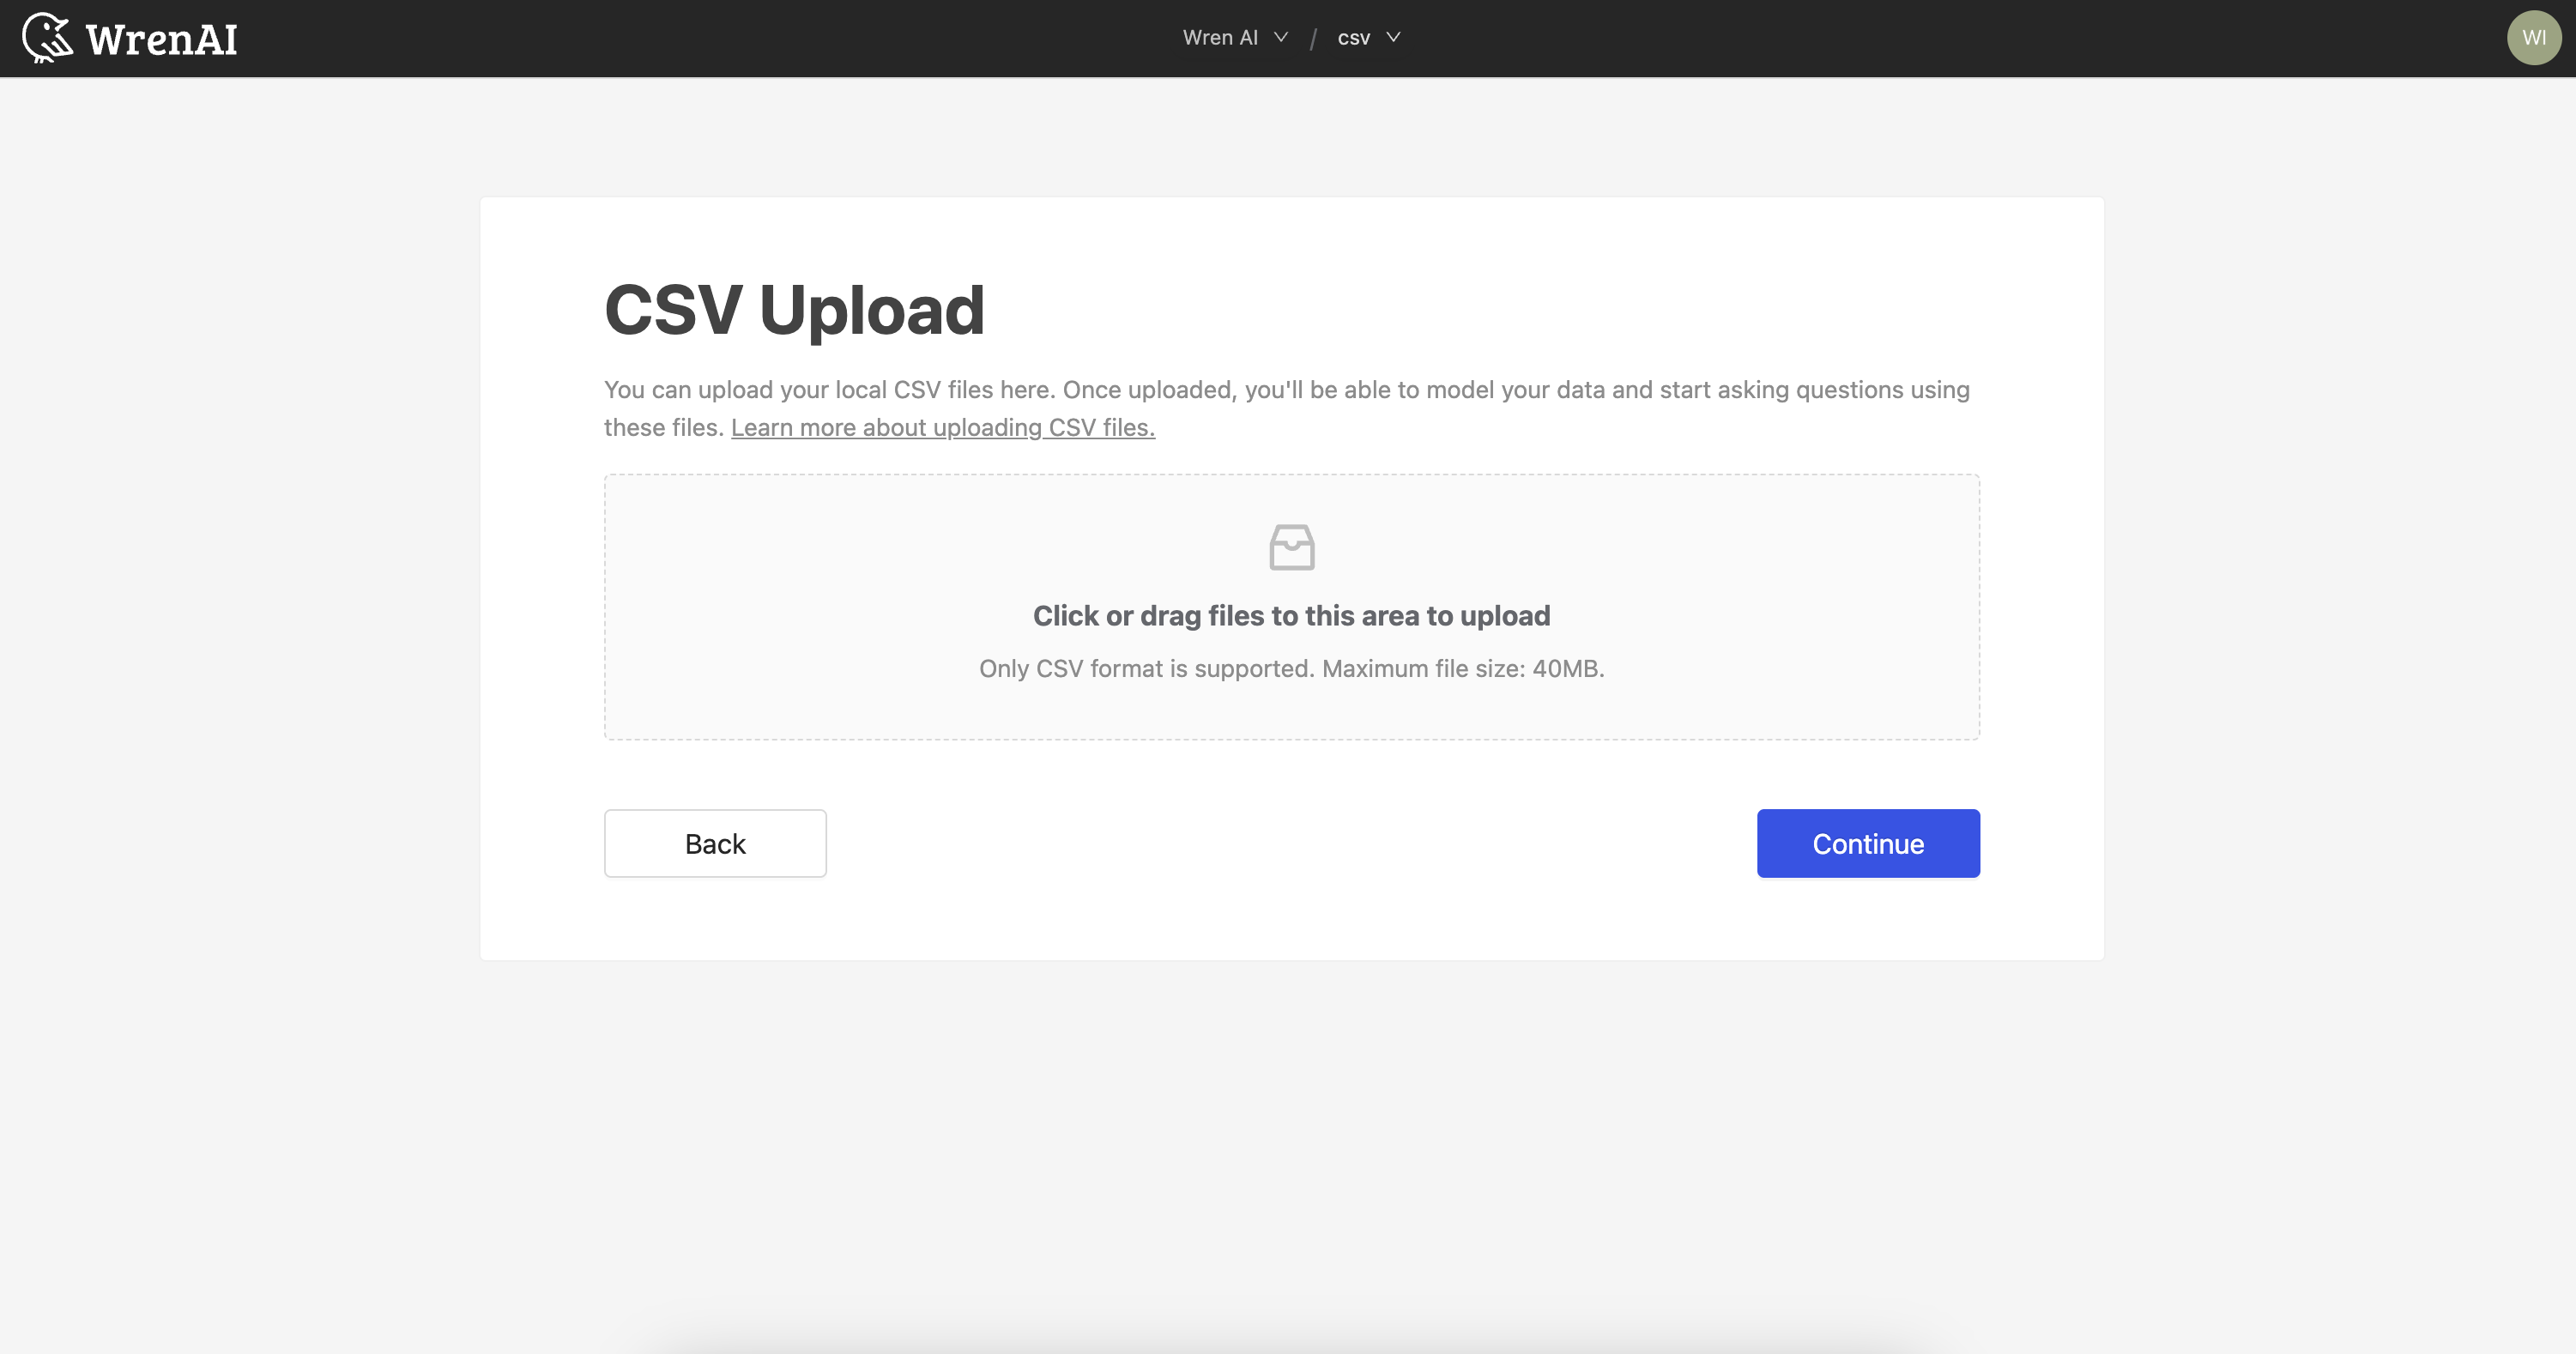
- Click the Upload button to select your CSV file(s)
- Wait for the upload to complete
- If the upload is successful, click Continue to proceed
- If there are any errors during upload, hover over the error icon to see details
Review Data Models
After successful upload, you'll see a list of data models created from your CSV files. Review the following for each model:
- Model name
- Field names and types
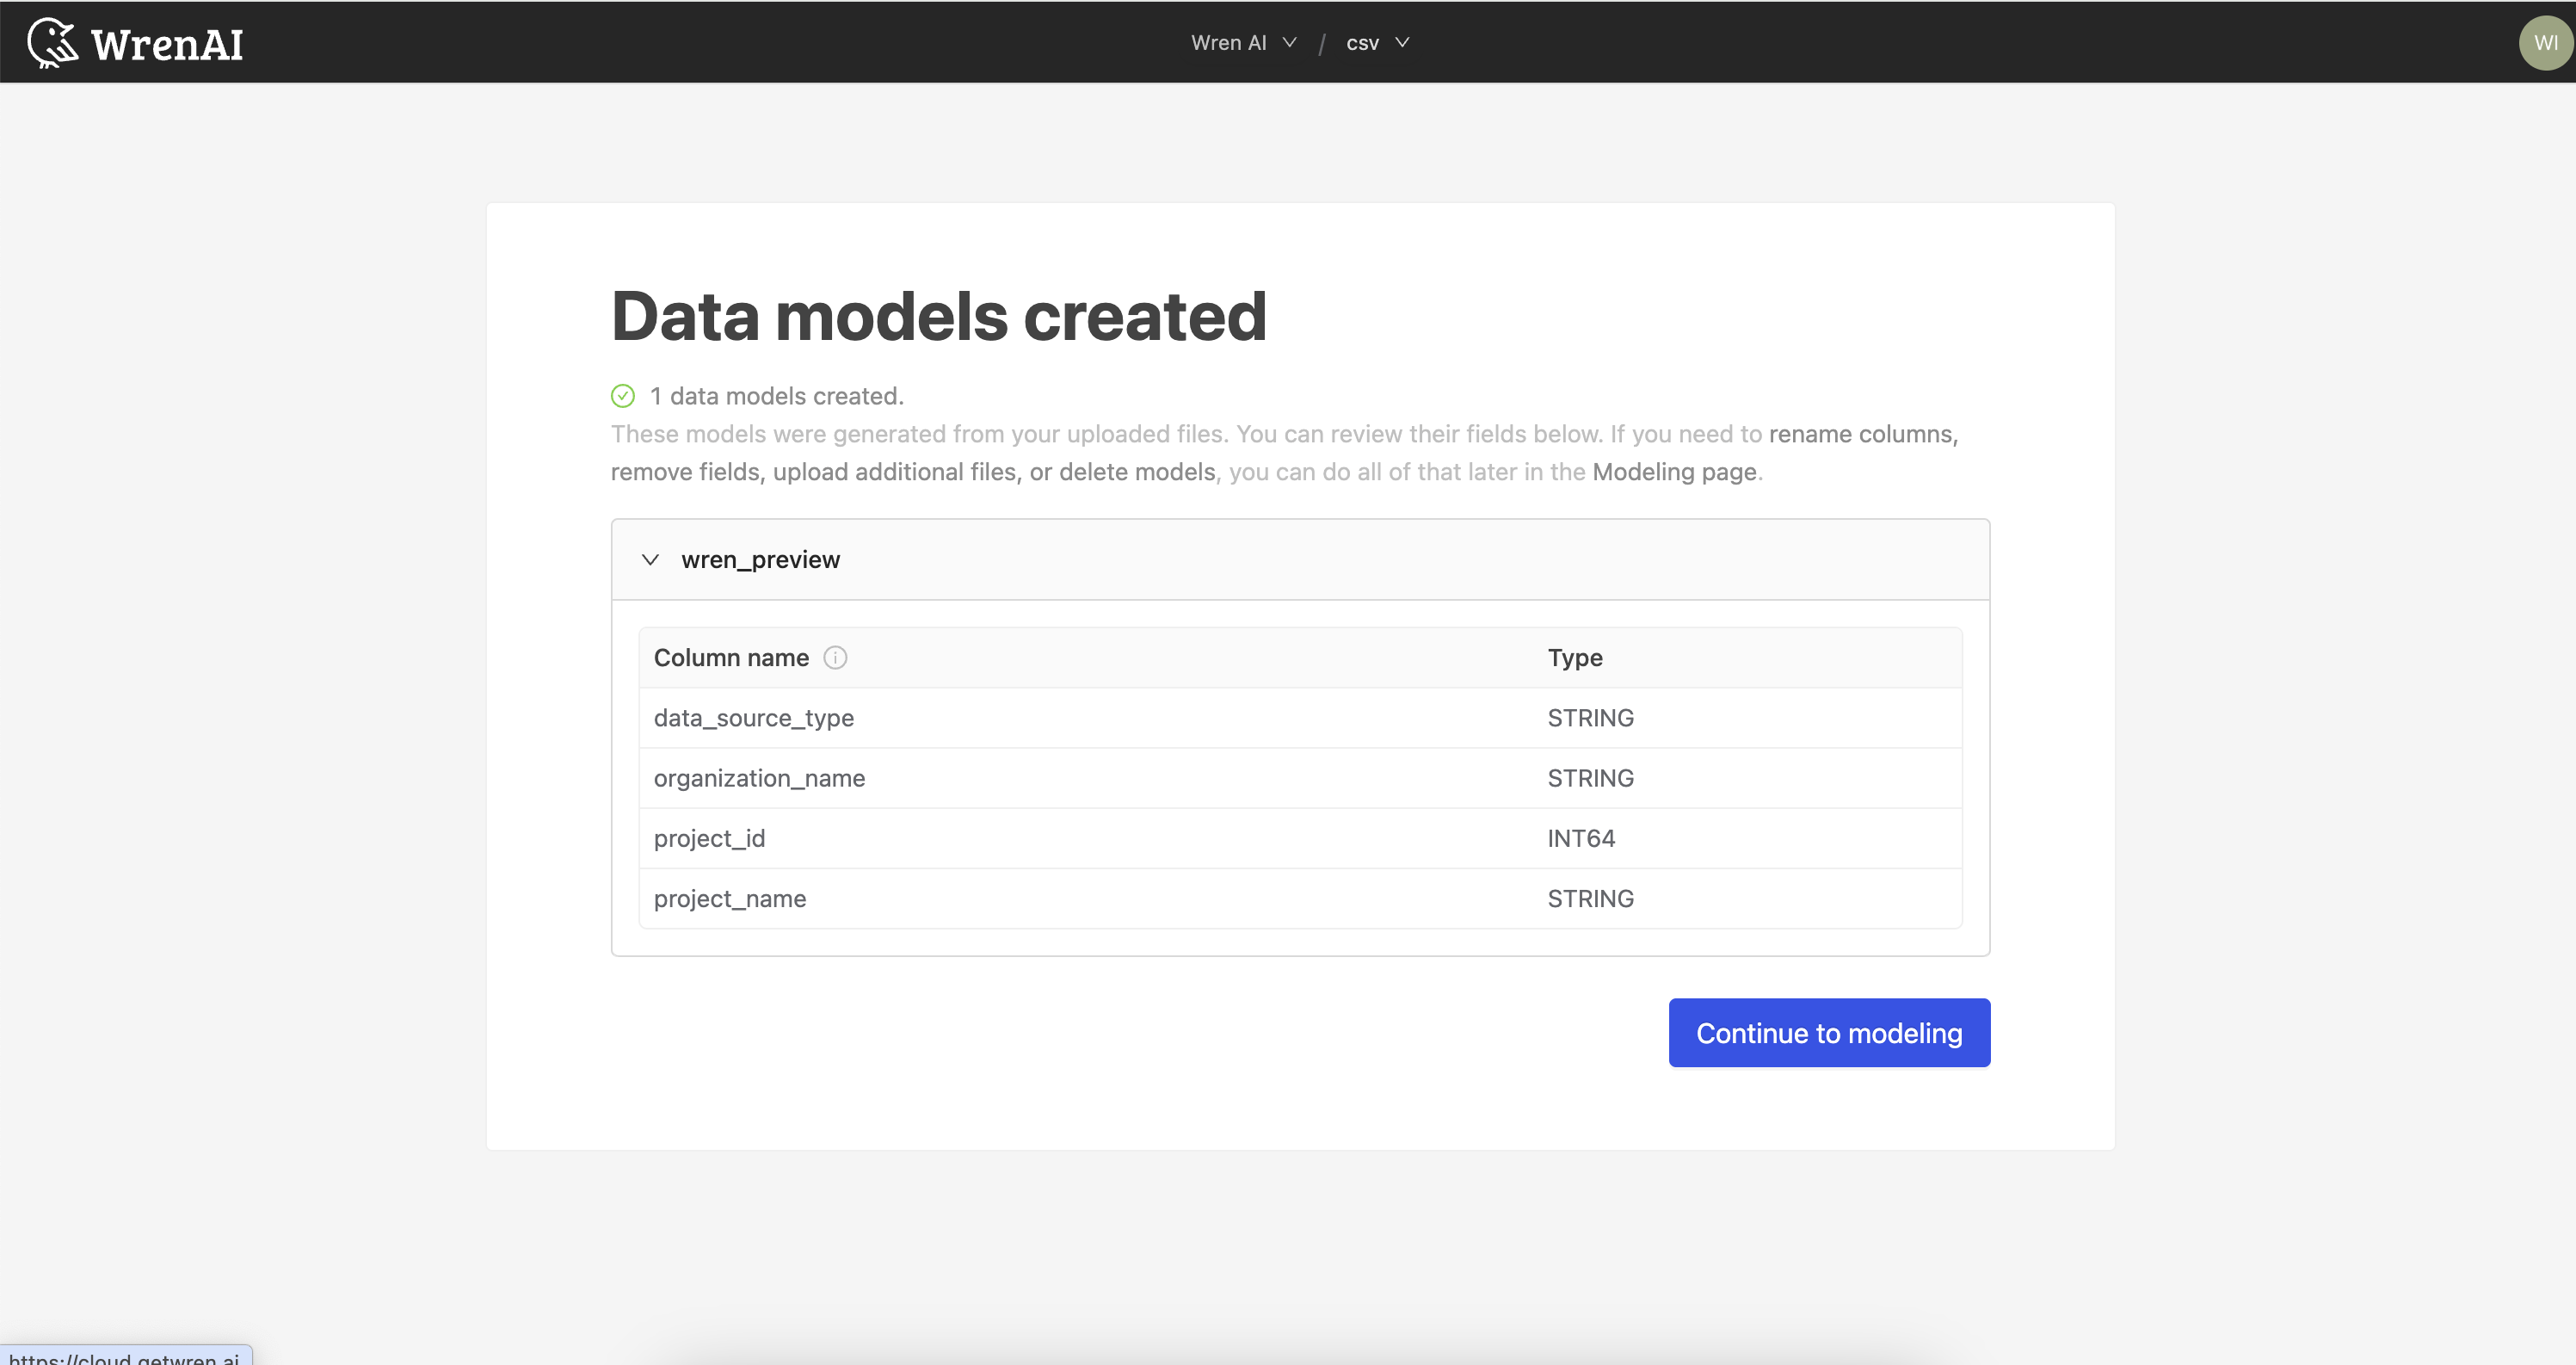
If everything looks correct, click Continue to proceed to modeling.
Supported Column Data Types
Supported Types
-
boolean:
true/false,t/f,yes/no,y/n -
date:
YYYY-MM-DD -
time:
HH:MM:SS[.SSSSSS] -
datetime / timestamp:
{YYYY/MM/DD or YYYY-MM-DD}{T or blankspace}{HH:MM[:SS[.SSSSSS]]}[Z or a UTC offset (like -05:00, UTC)]Explanation
{YYYY/MM/DD or YYYY-MM-DD}- The date portion
- Can use slashes (2025/08/06) or hyphens (2025-08-06)
- YYYY = 4-digit year, MM = 2-digit month, DD = 2-digit day
{T or space}- Separator between the date and time
- Either a literal T (ISO 8601 standard) → 2025-08-06T14:35:22
- Or a blank space → 2025-08-06 14:35:22
{HH:MM[:SS[.SSSSSS]]]}- The time portion
- HH:MM (hours and minutes) are required
- Optional seconds (SS) → 14:35:22
- Optional fractional seconds (.SSSSSS) → 14:35:22.123456
[Z or UTC offset](optional)- Indicates time zone
- Z means UTC (“Zulu time”) → 2025-08-06T14:35:22Z
- Or a UTC offset → +05:00, -05:00, UTC
- Example: 2025-08-06 14:35:22-05:00
Example Values
- 2025-08-06T14:35
- 2025/08/06 14:35:22
- 2025-08-06T14:35:22.123Z
- 2025-08-06 14:35:22+08:00
Not Supported by Auto-Detection
The following types are loaded as STRING:
- bytes
- geography
- json
- interval
- range
Additional Operations
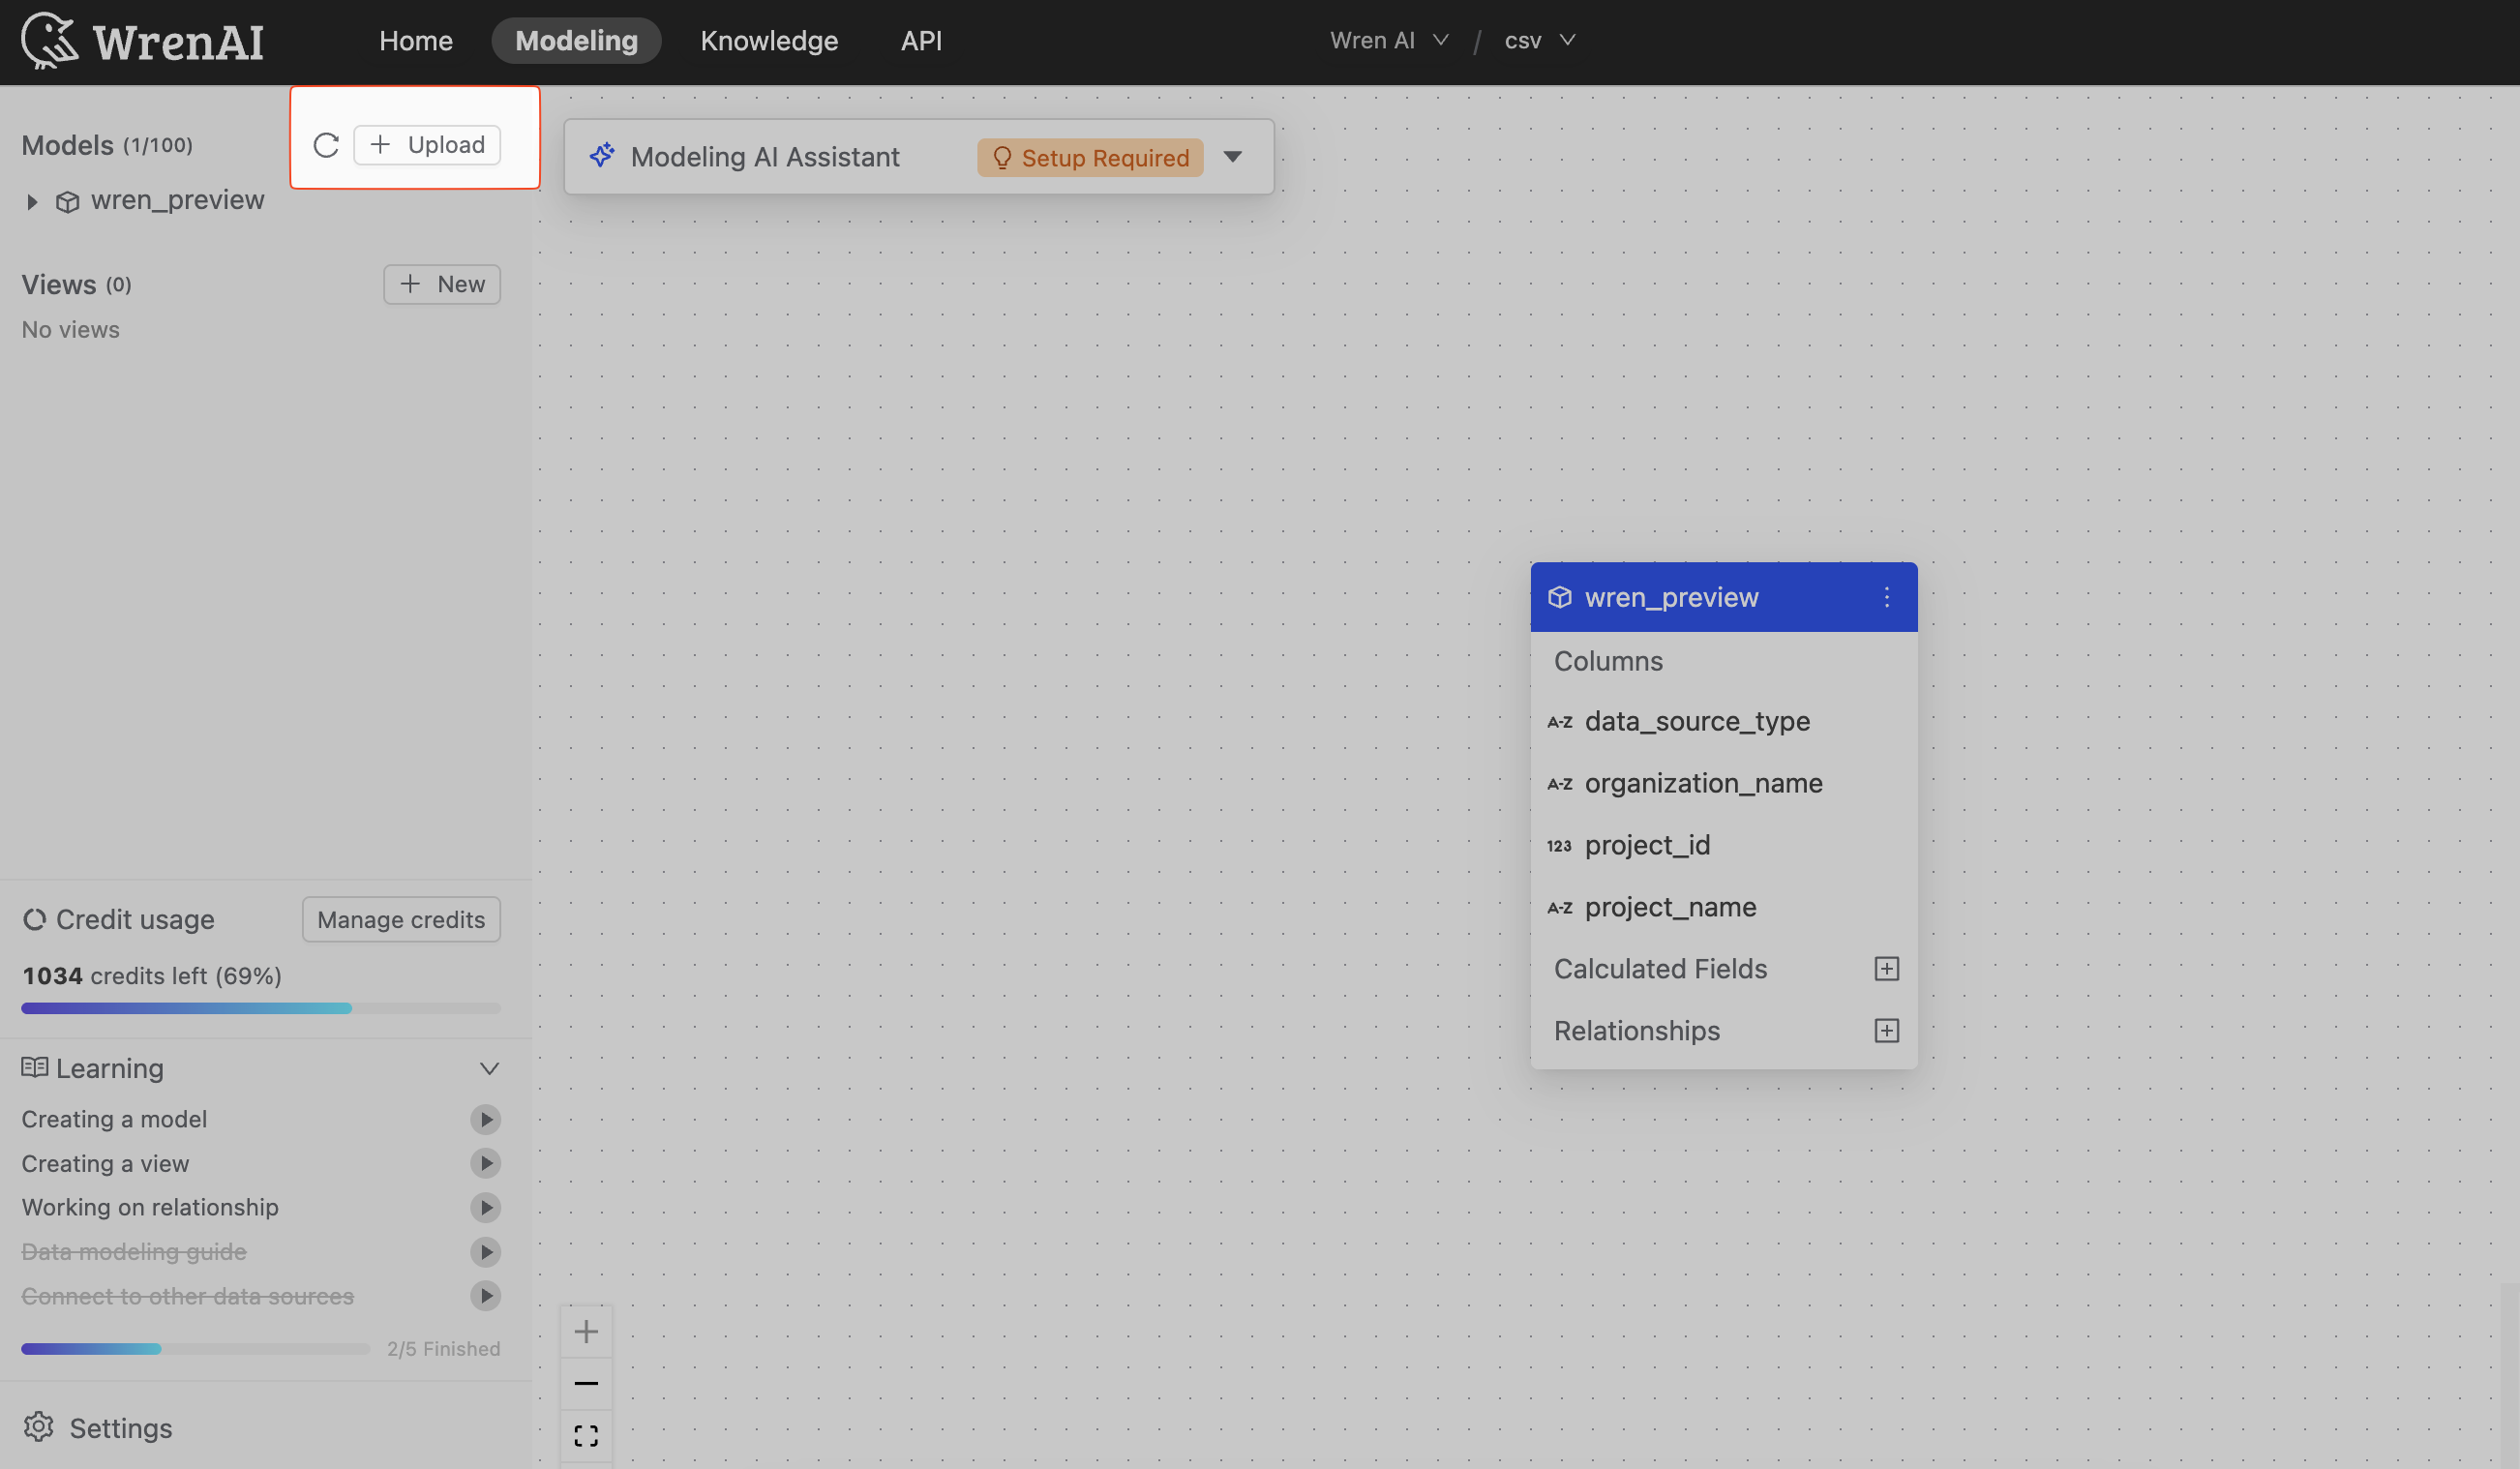
Upload More Files
To upload additional CSV files:
- Go to the modeling page
- Click the Upload button in the sidebar
Override Existing CSV Files
To replace an existing CSV file for a model:
- Go to the modeling page
- Click the More icon (⋮) on the model card
- Select Override CSV file
- Upload the new CSV file
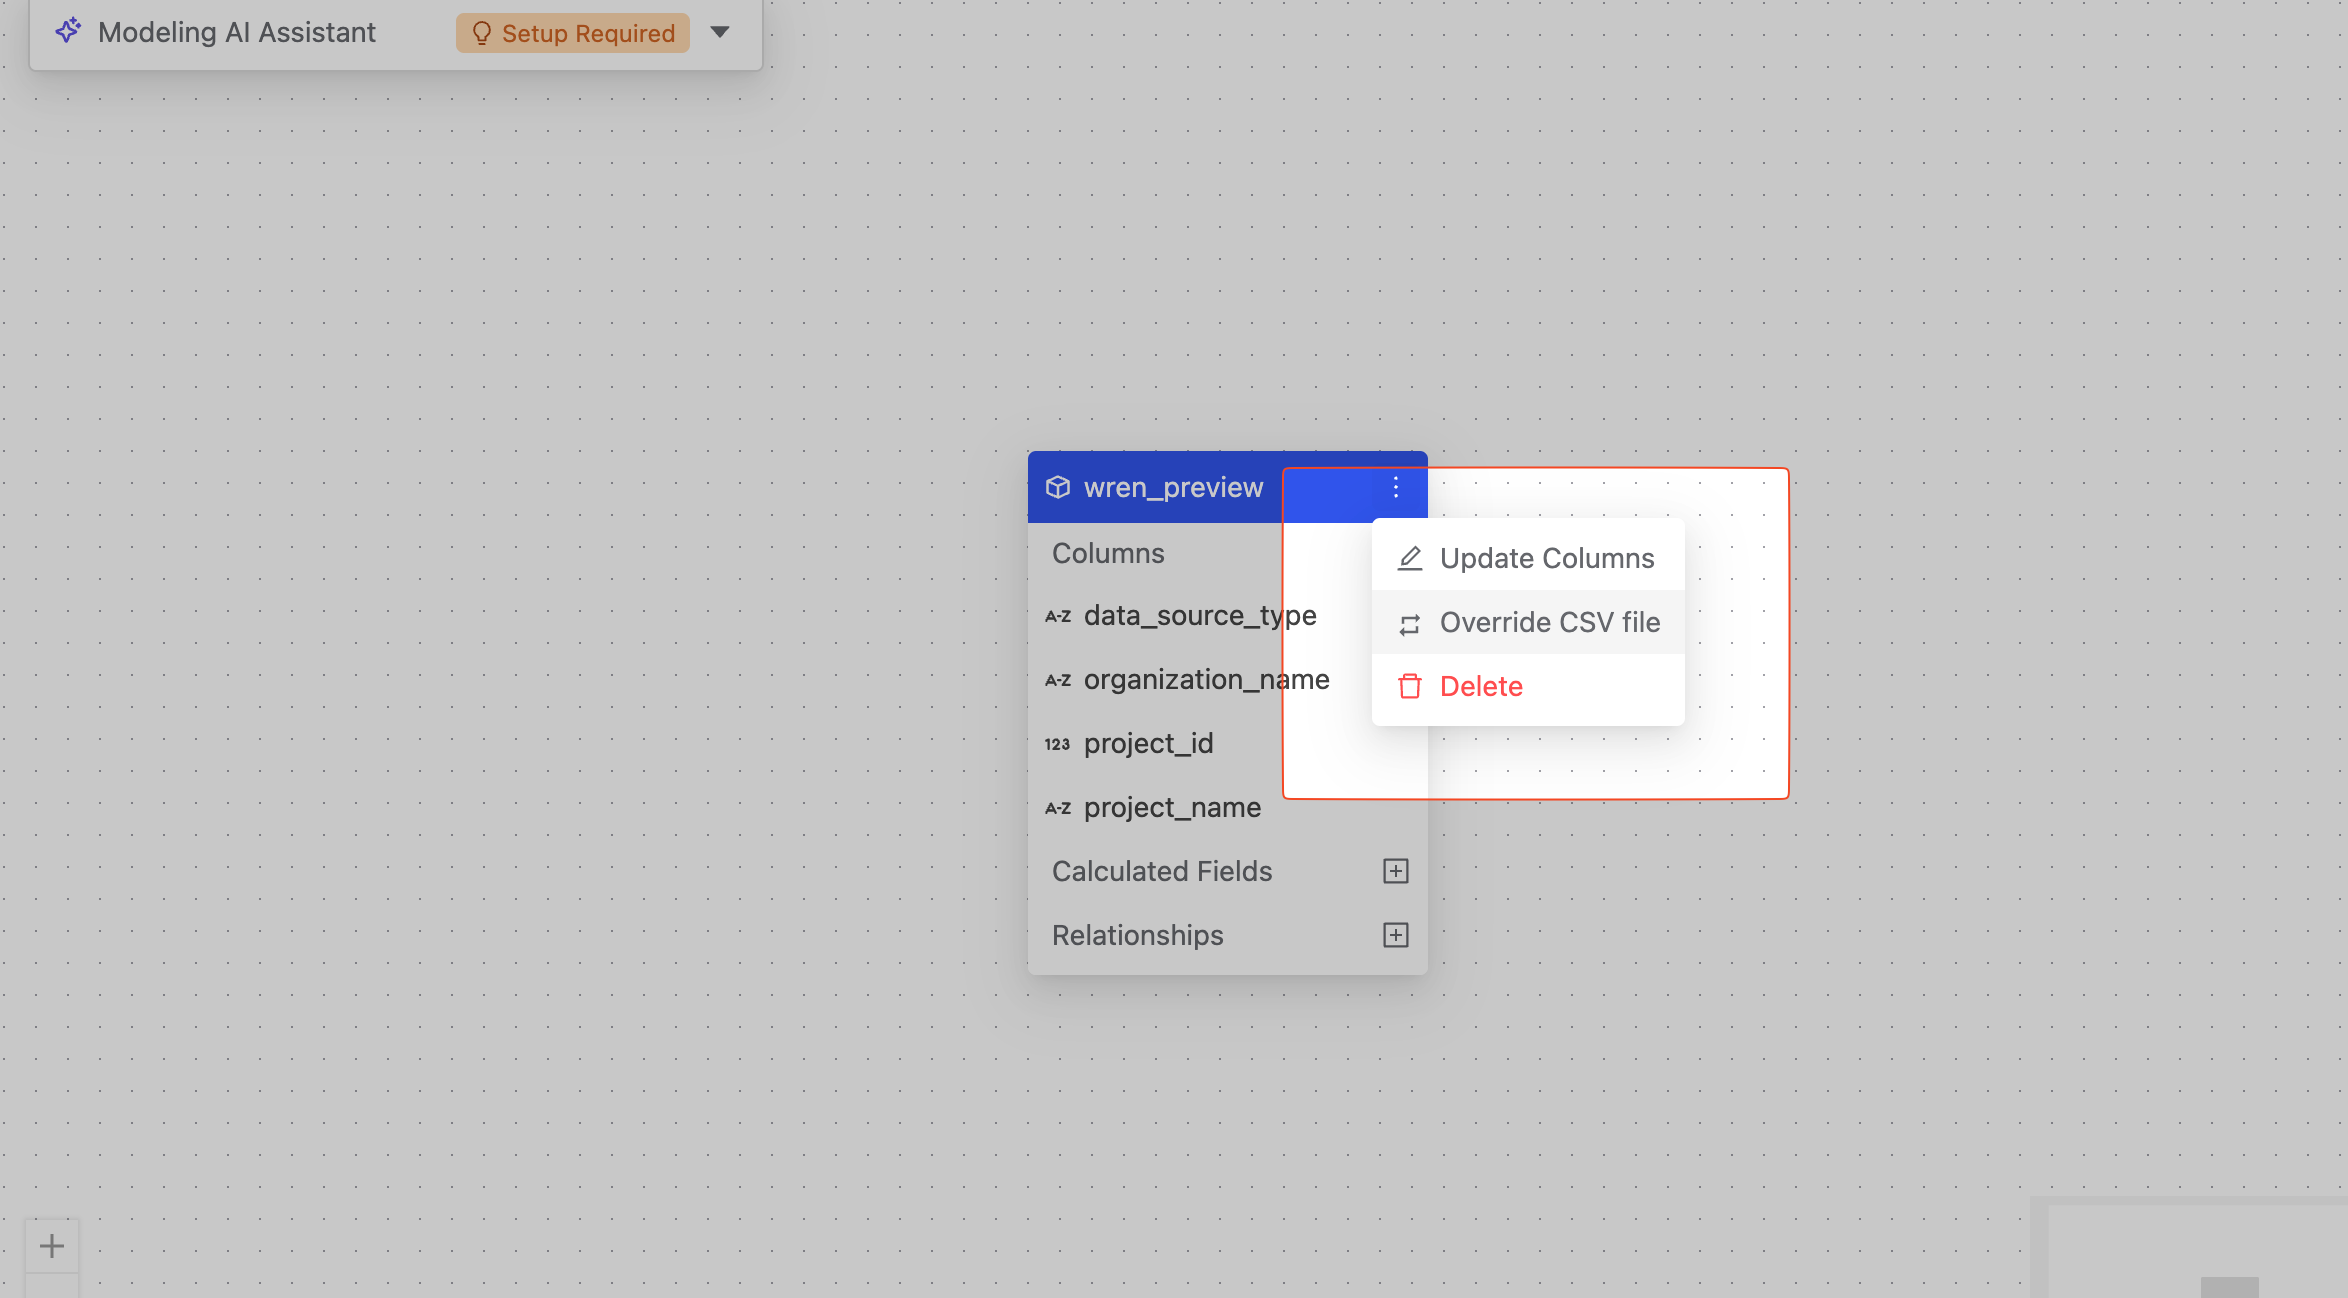
Overriding a CSV file will replace the existing data. Make sure to back up any important data before proceeding.
Next Steps
After setting up your CSV data source, you can:
- Define relationships between models
- Create calculated fields
- Build dashboards
- Query your data using natural language
See the Modeling documentation to learn more about working with your data models.