Quickstart with your own data
This guide walks through a simple own-data workflow in Wren AI by loading CSV files through DuckDB, selecting tables, and defining relationships.
Before you begin
- Install and start Wren AI by following Installation.
- Make sure Docker Desktop is running.
- This example uses DuckDB and CSV files. If you want to connect a database instead, see Connect Data Sources Overview.
- The commands below assume your Wren Engine container is named
wrenai-wren-engine-1, which is the default launcher setup. If your container has a different name, replace it in the commands.
To try the workflow quickly, download the sample archive: e-commerce.tar
1. Prepare your dataset files
Download the sample archive above, or prepare your own CSV files.
In this walkthrough, we use the e-commerce sample files to demonstrate the workflow. See DuckDB for supported file formats and connection details.
2. Create a data folder in the Wren Engine container
docker exec wrenai-wren-engine-1 bash -c "mkdir -p /usr/src/app/etc/data"
3. Copy the archive into the container
Run this command from the directory that contains e-commerce.tar:
docker cp ./e-commerce.tar wrenai-wren-engine-1:/usr/src/app/etc/data/
4. Extract the archive in the container
docker exec wrenai-wren-engine-1 bash -c "tar xvf /usr/src/app/etc/data/e-commerce.tar -C /usr/src/app/etc/data"
5. Create a DuckDB connection in Wren AI
In Wren AI, click DuckDB in the Connect a data source section.

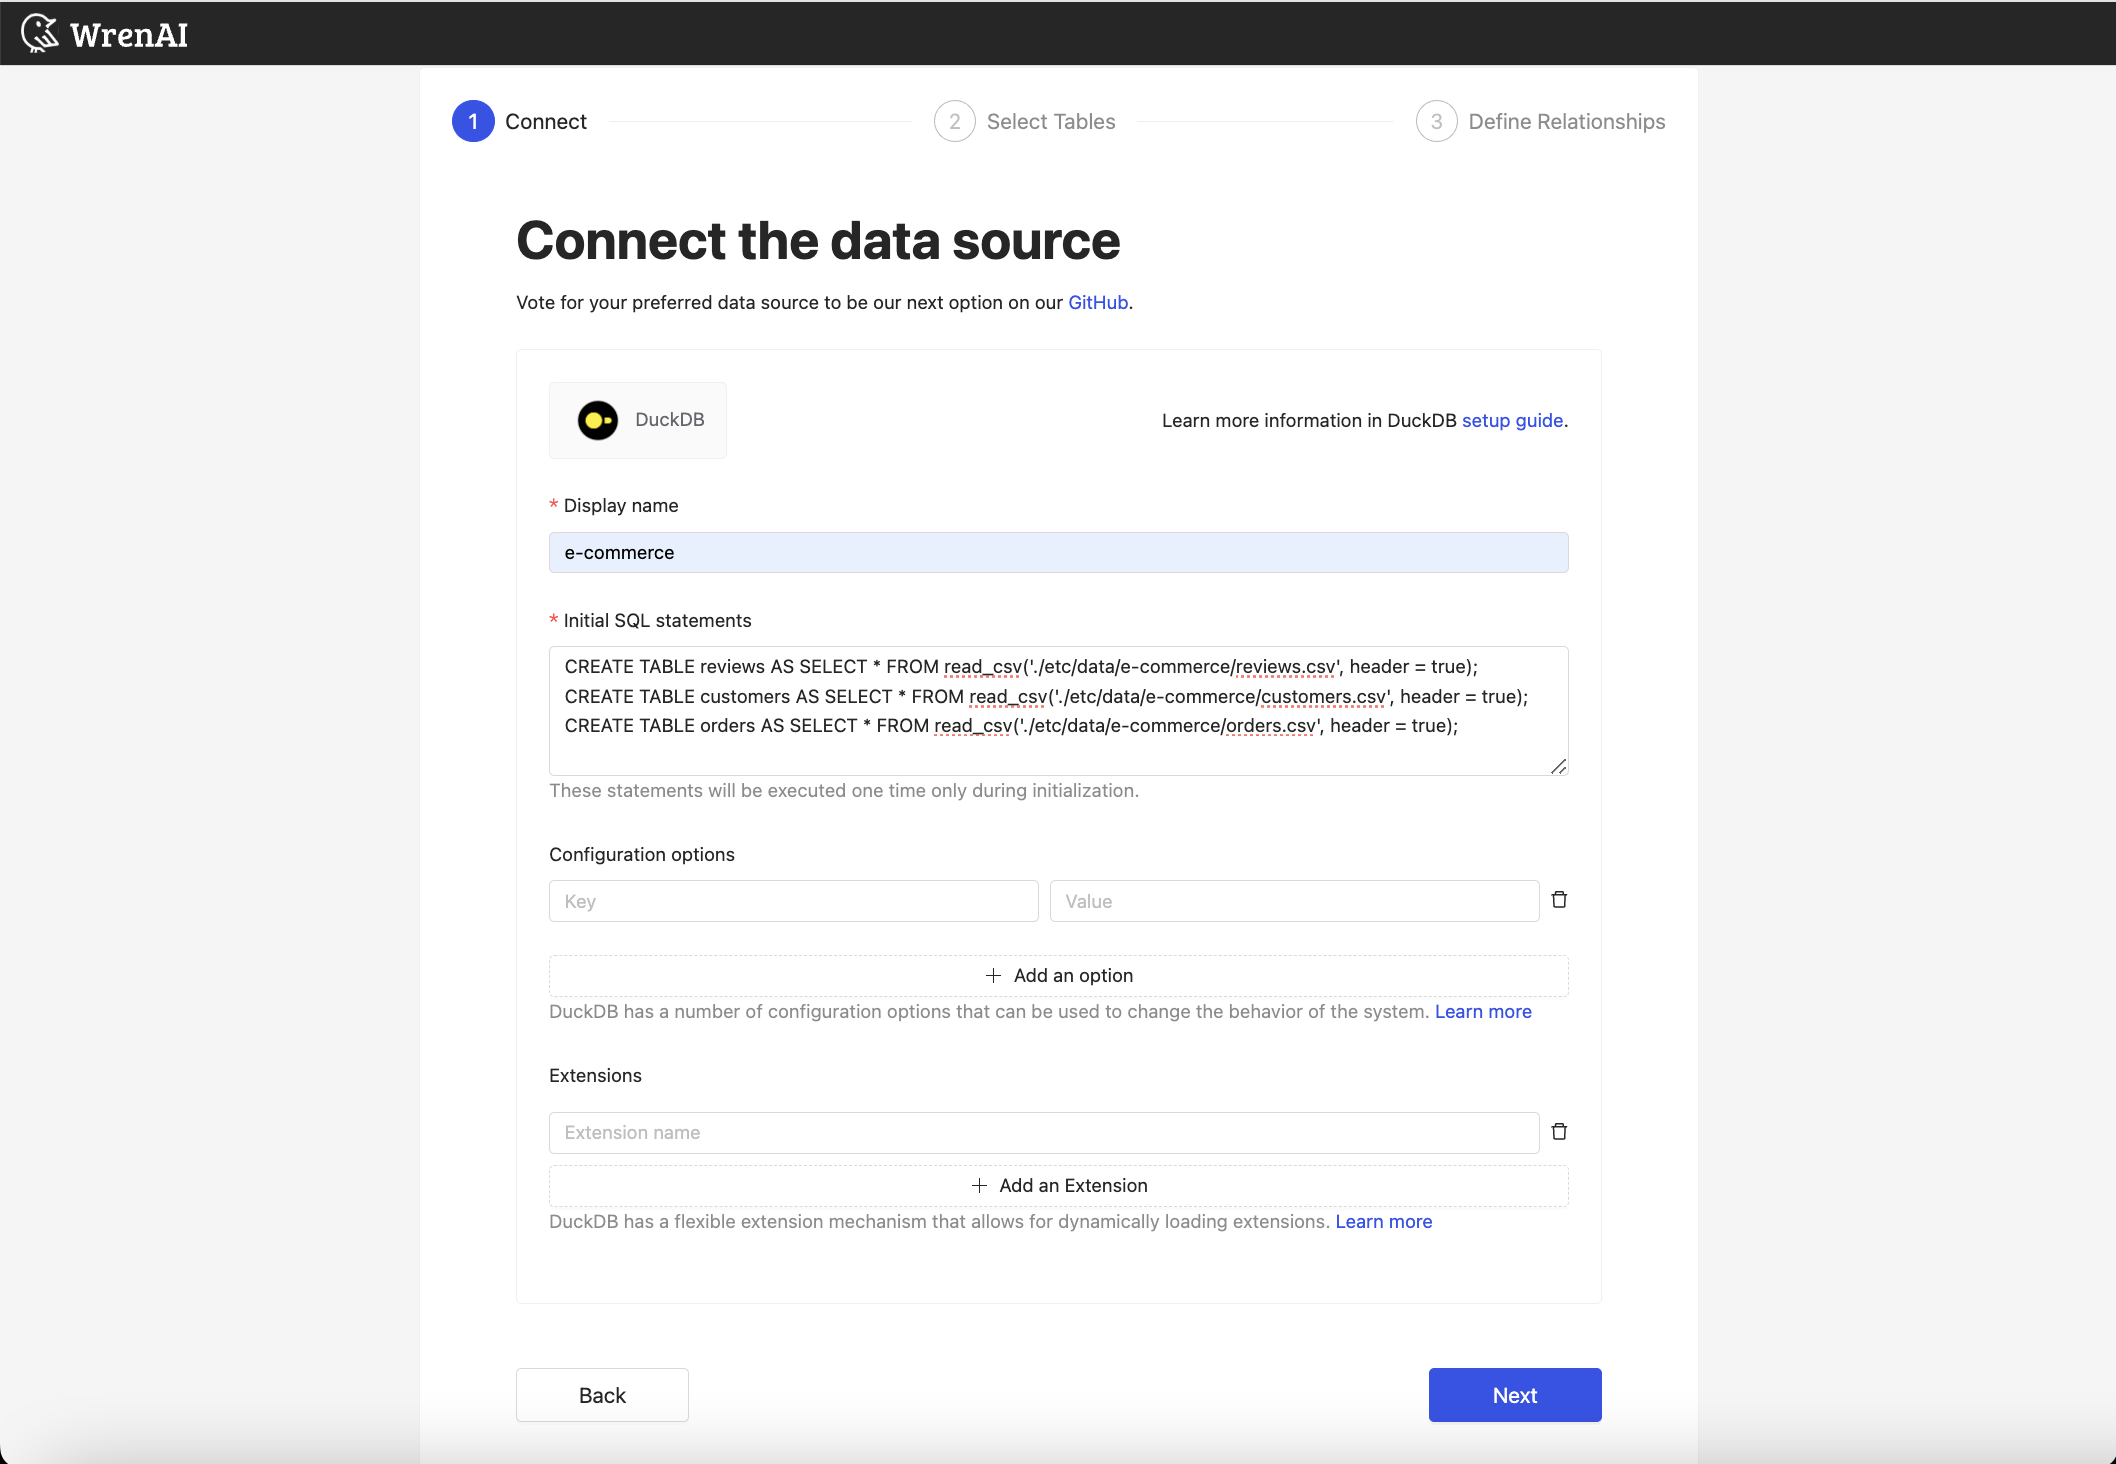
6. Enter the connection properties
Fill in the connection form:
- Display name:
e-commerce - Initial SQL statements: use the following SQL to load the CSV files
CREATE TABLE reviews AS SELECT * FROM read_csv('./etc/data/e-commerce/reviews.csv', header = true);
CREATE TABLE customers AS SELECT * FROM read_csv('./etc/data/e-commerce/customers.csv', header = true);
CREATE TABLE orders AS SELECT * FROM read_csv('./etc/data/e-commerce/orders.csv', header = true);
Then click Next.
7. Select the tables to import
Each CSV file appears as a table. Select all tables, then click Next.

8. Define relationships between tables
Click +Add to define the table relationships that make the data model visible to Wren AI.
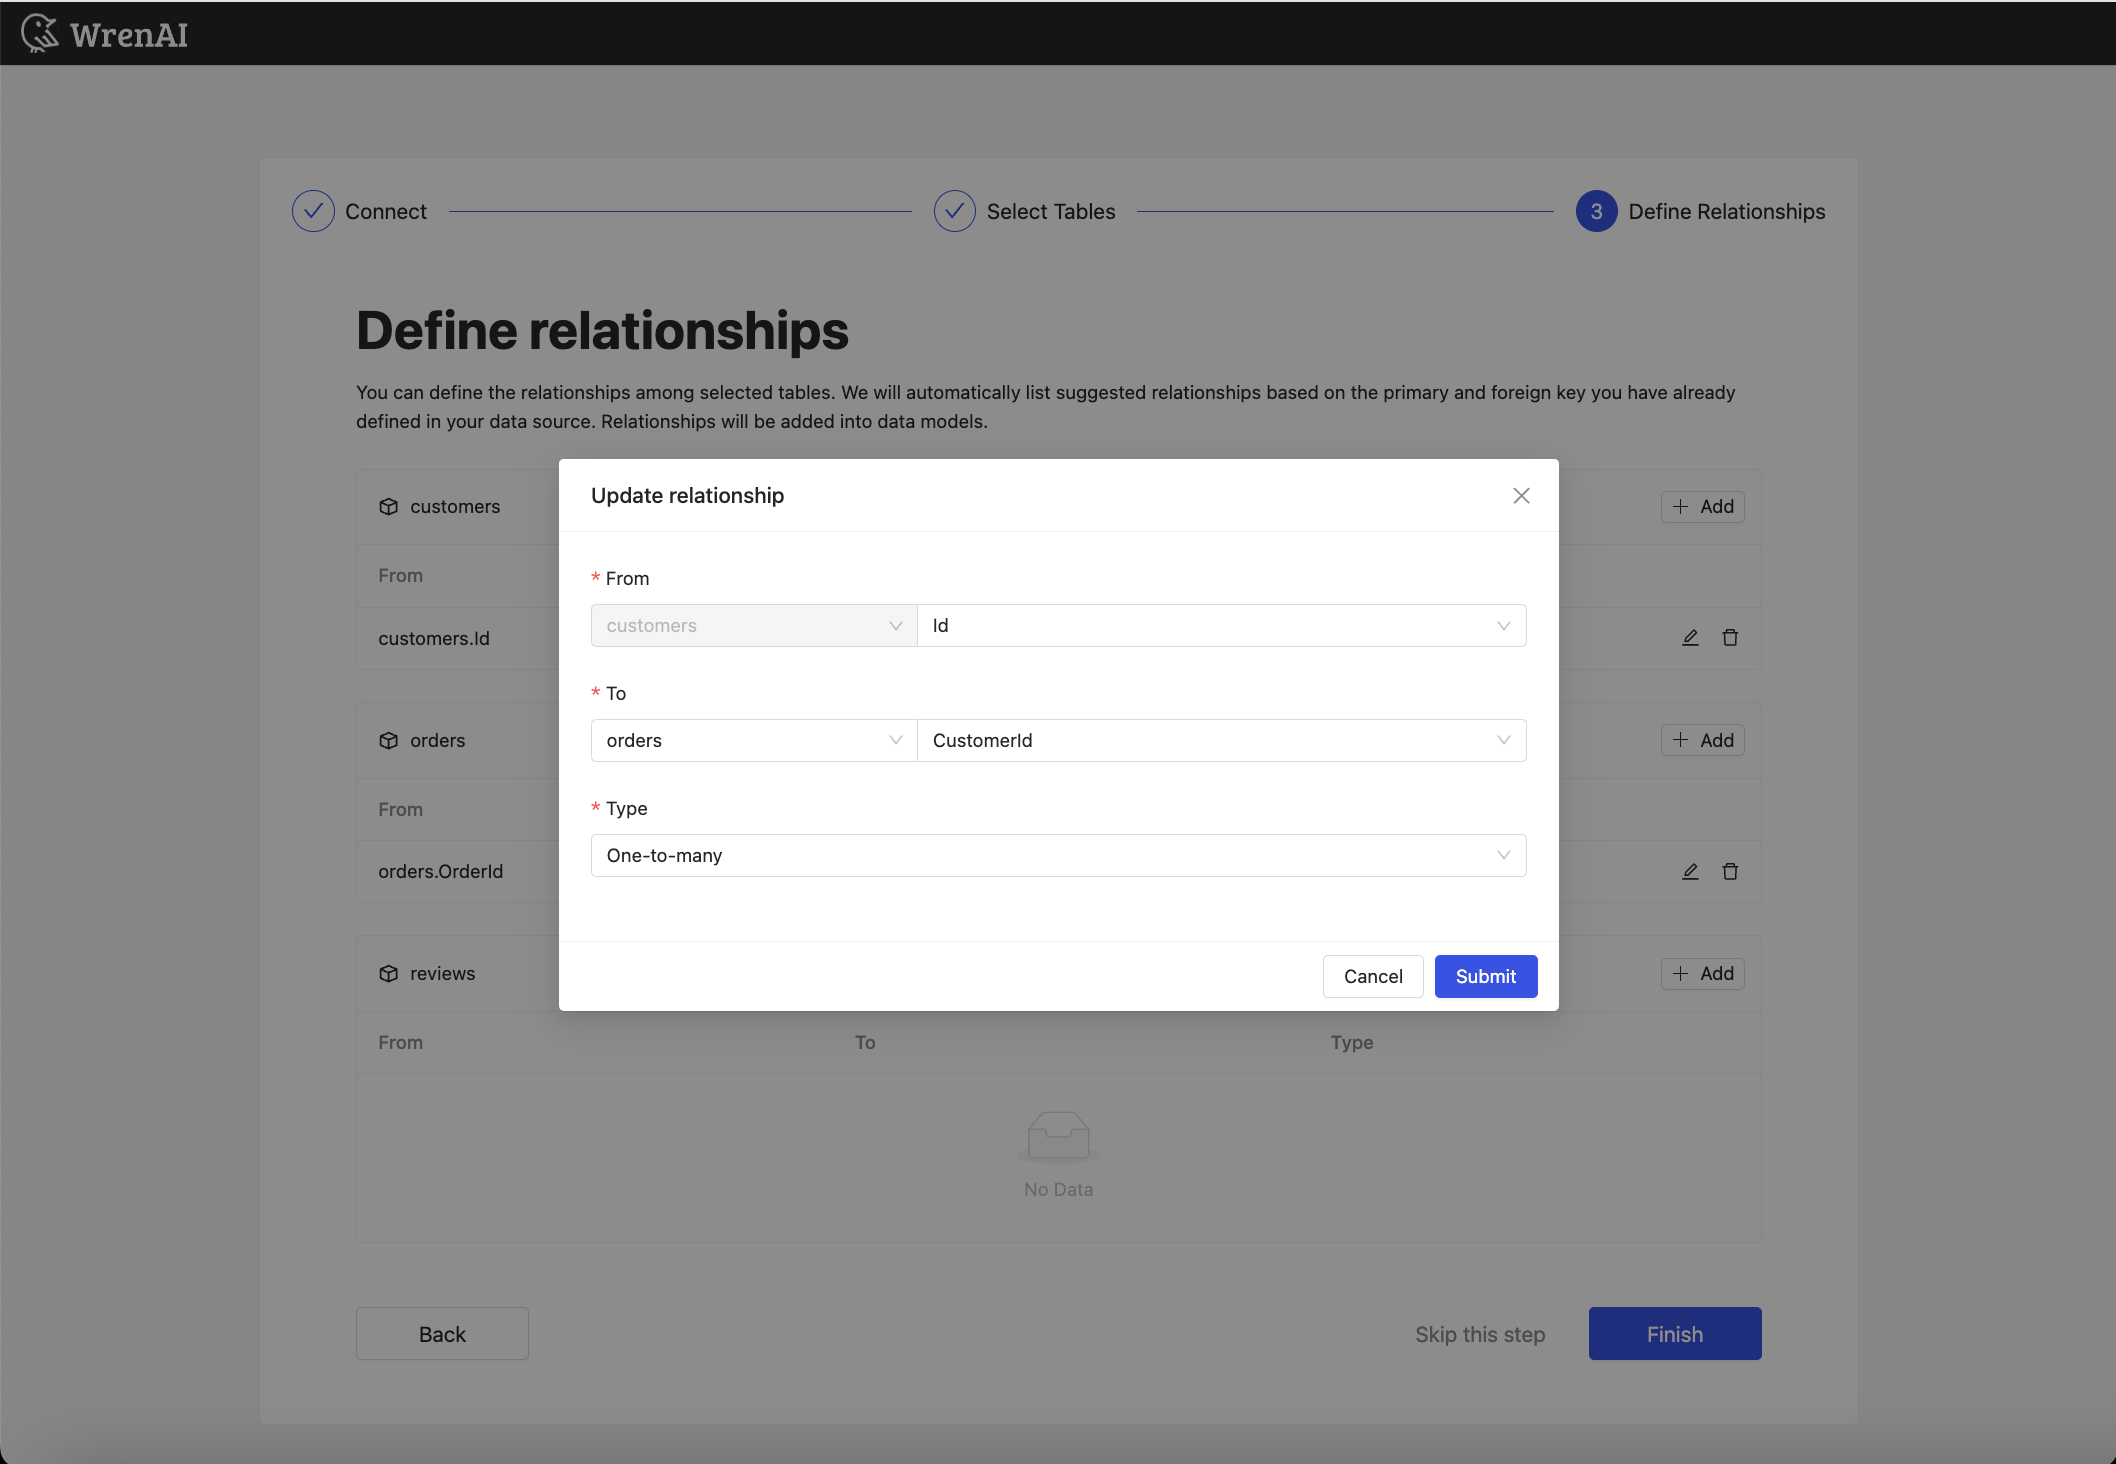
Add these relationships:
| From | To | Type |
|---|---|---|
| customers.Id | orders.CustomerId | One-to-Many |
| orders.OrderId | reviews.OrderId | One-to-Many |
Then click Finish.
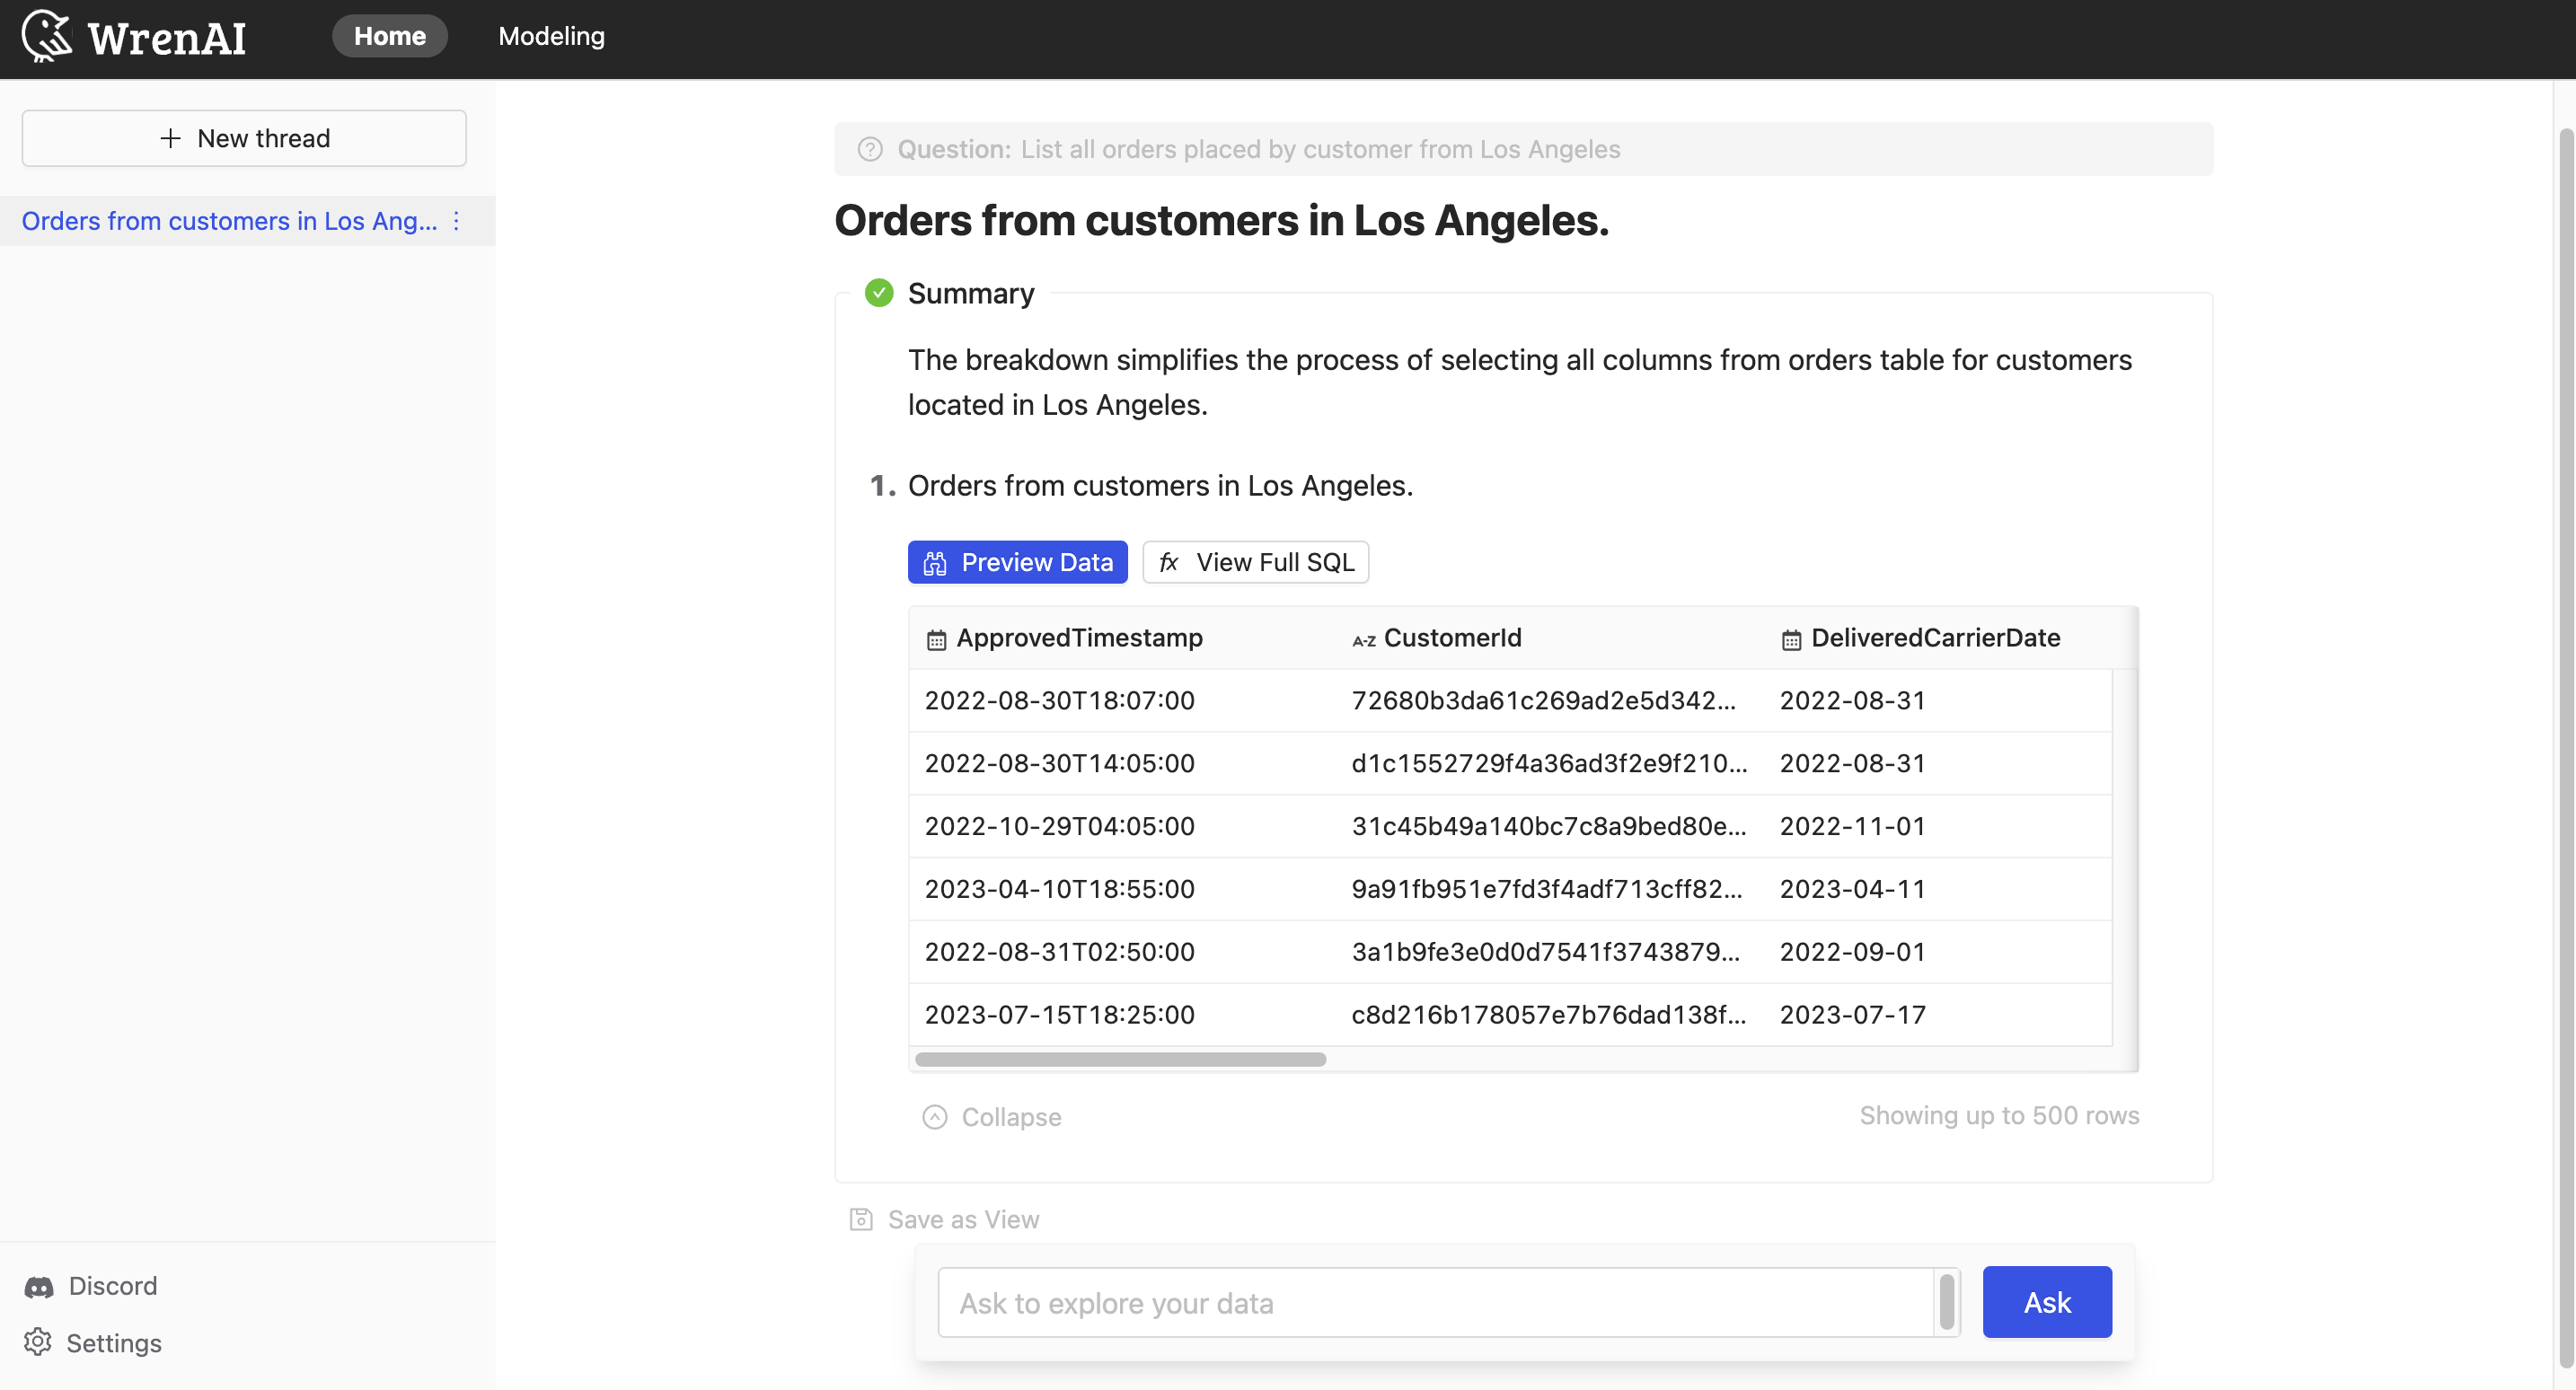
Result
After the connection is created:
- You should see the imported tables on the Modeling page.
- You can open the Home page and start asking questions about the data.

Next steps
- Learn how to organize your datasets in Data Modeling Overview.
- Add descriptions and semantic details in Models.
- Start asking questions from the Home page.